Free 3D Octagon Pillow Pattern

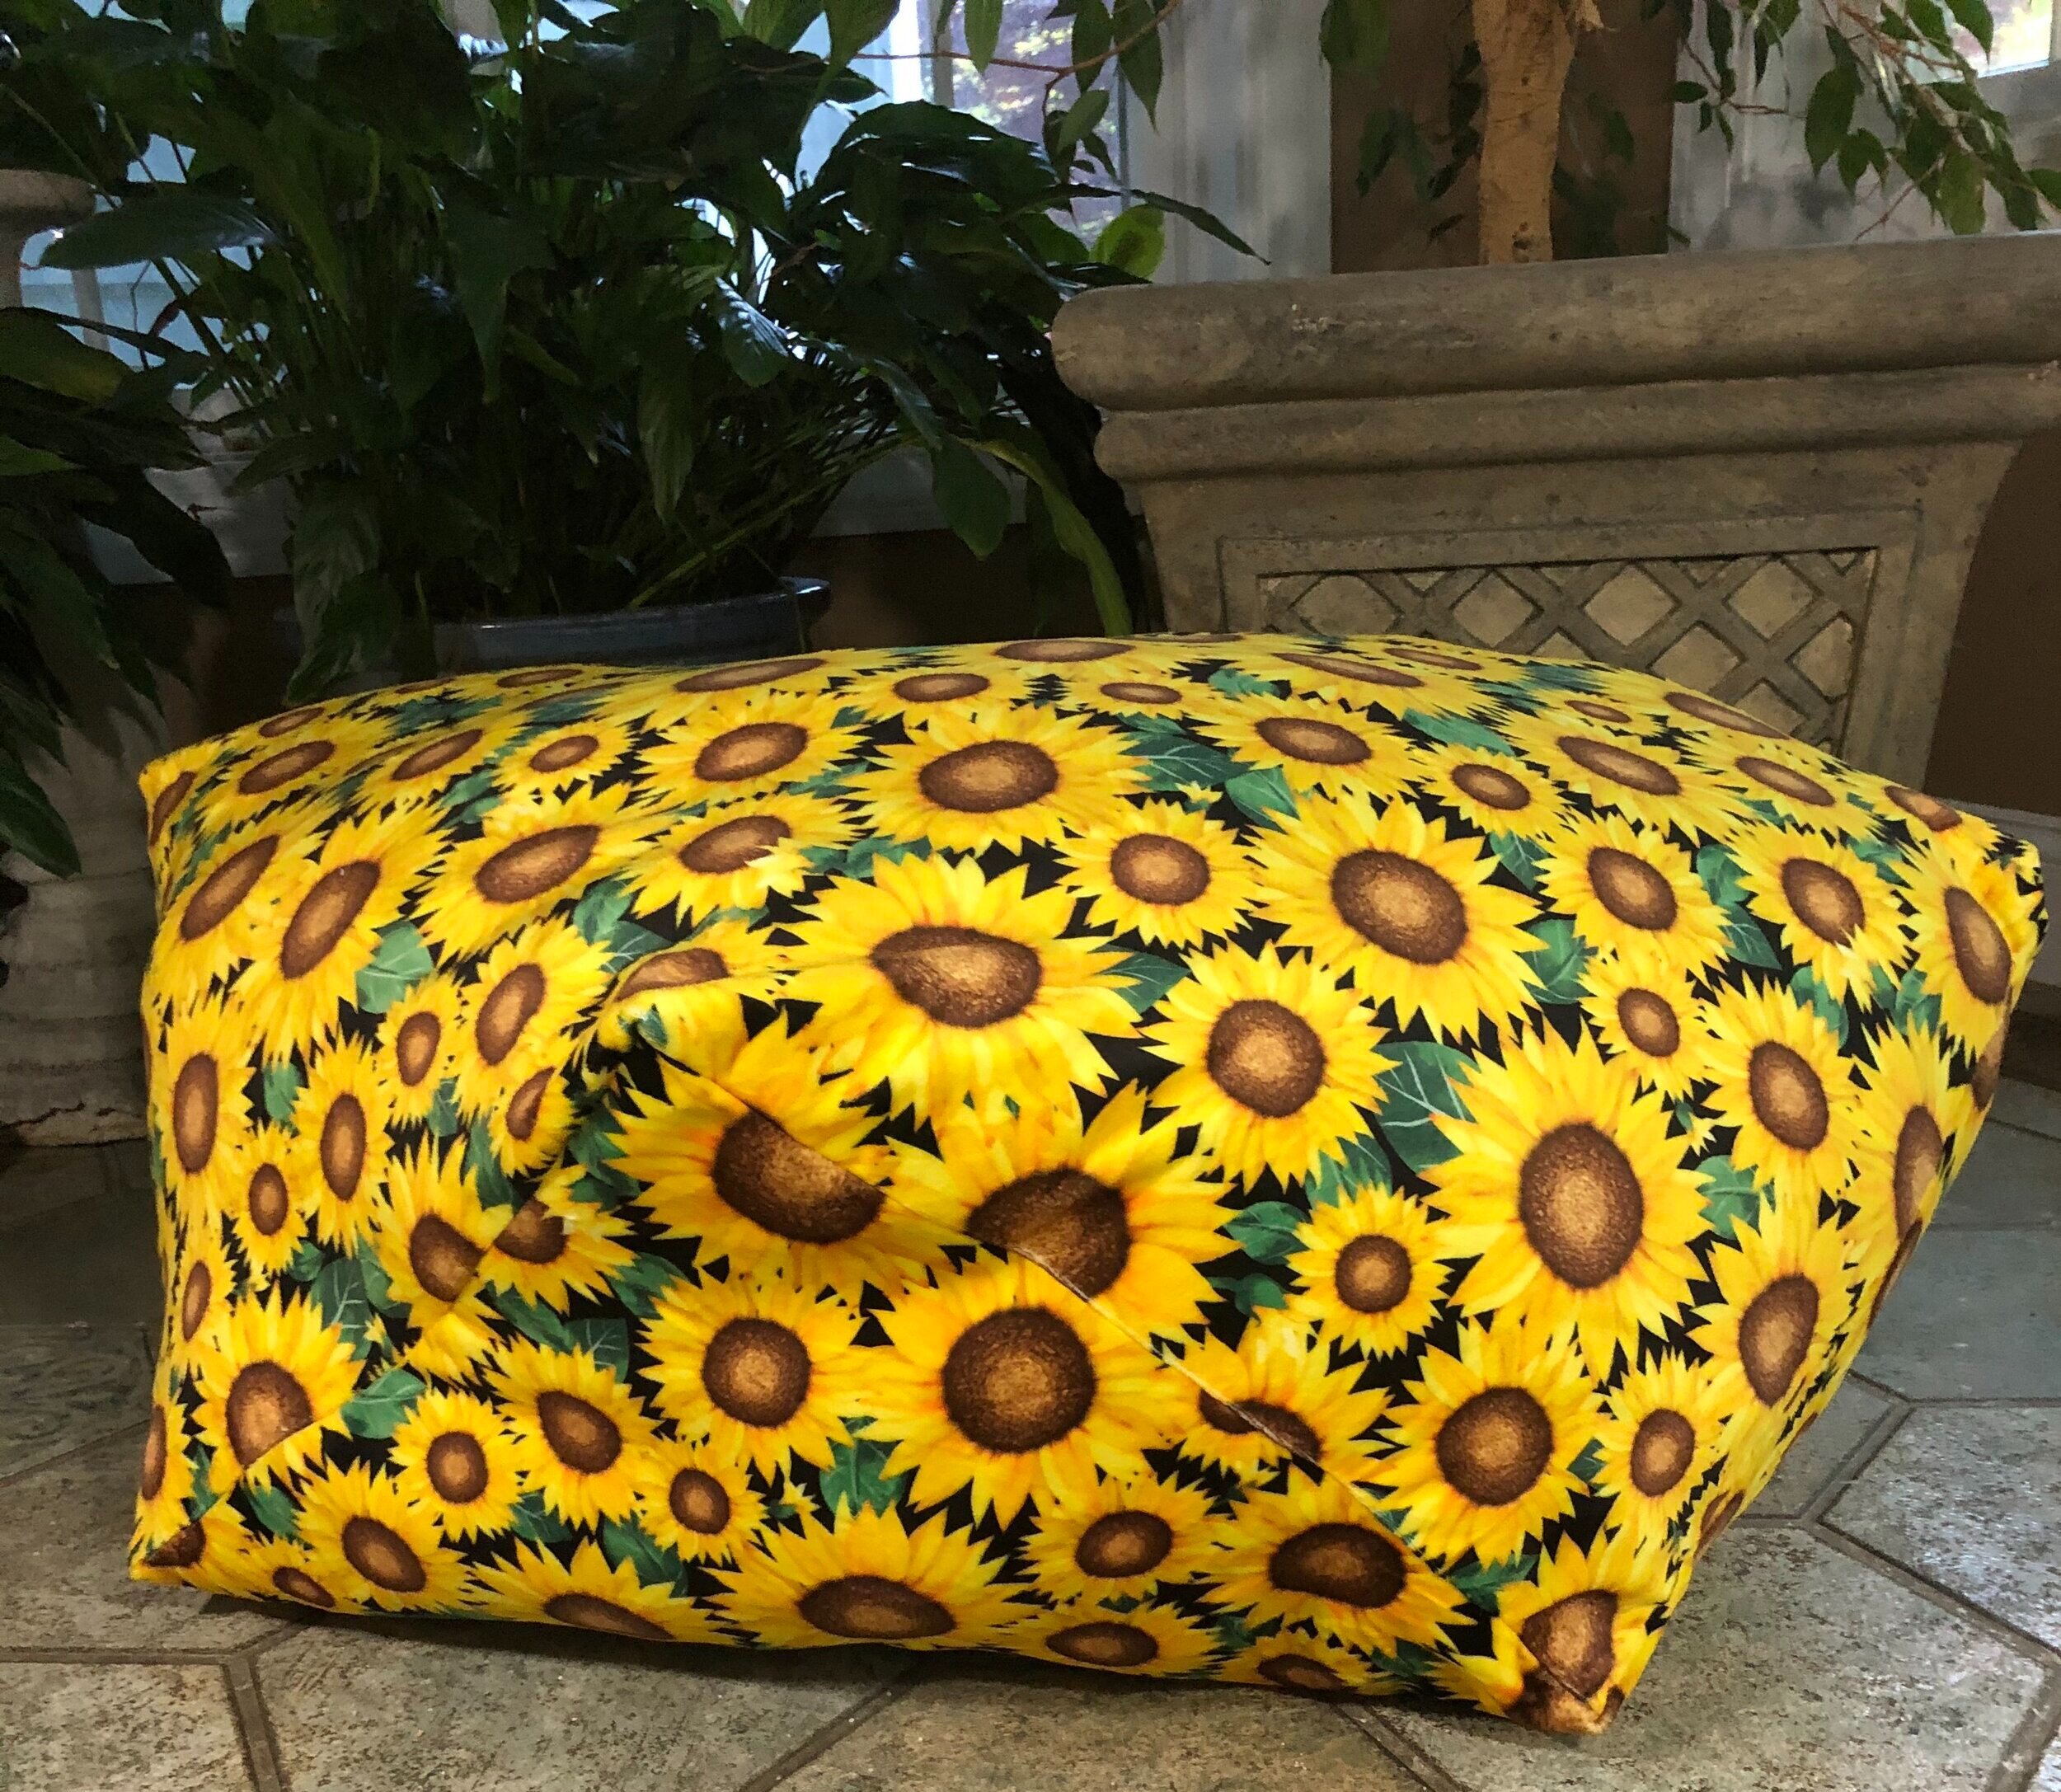
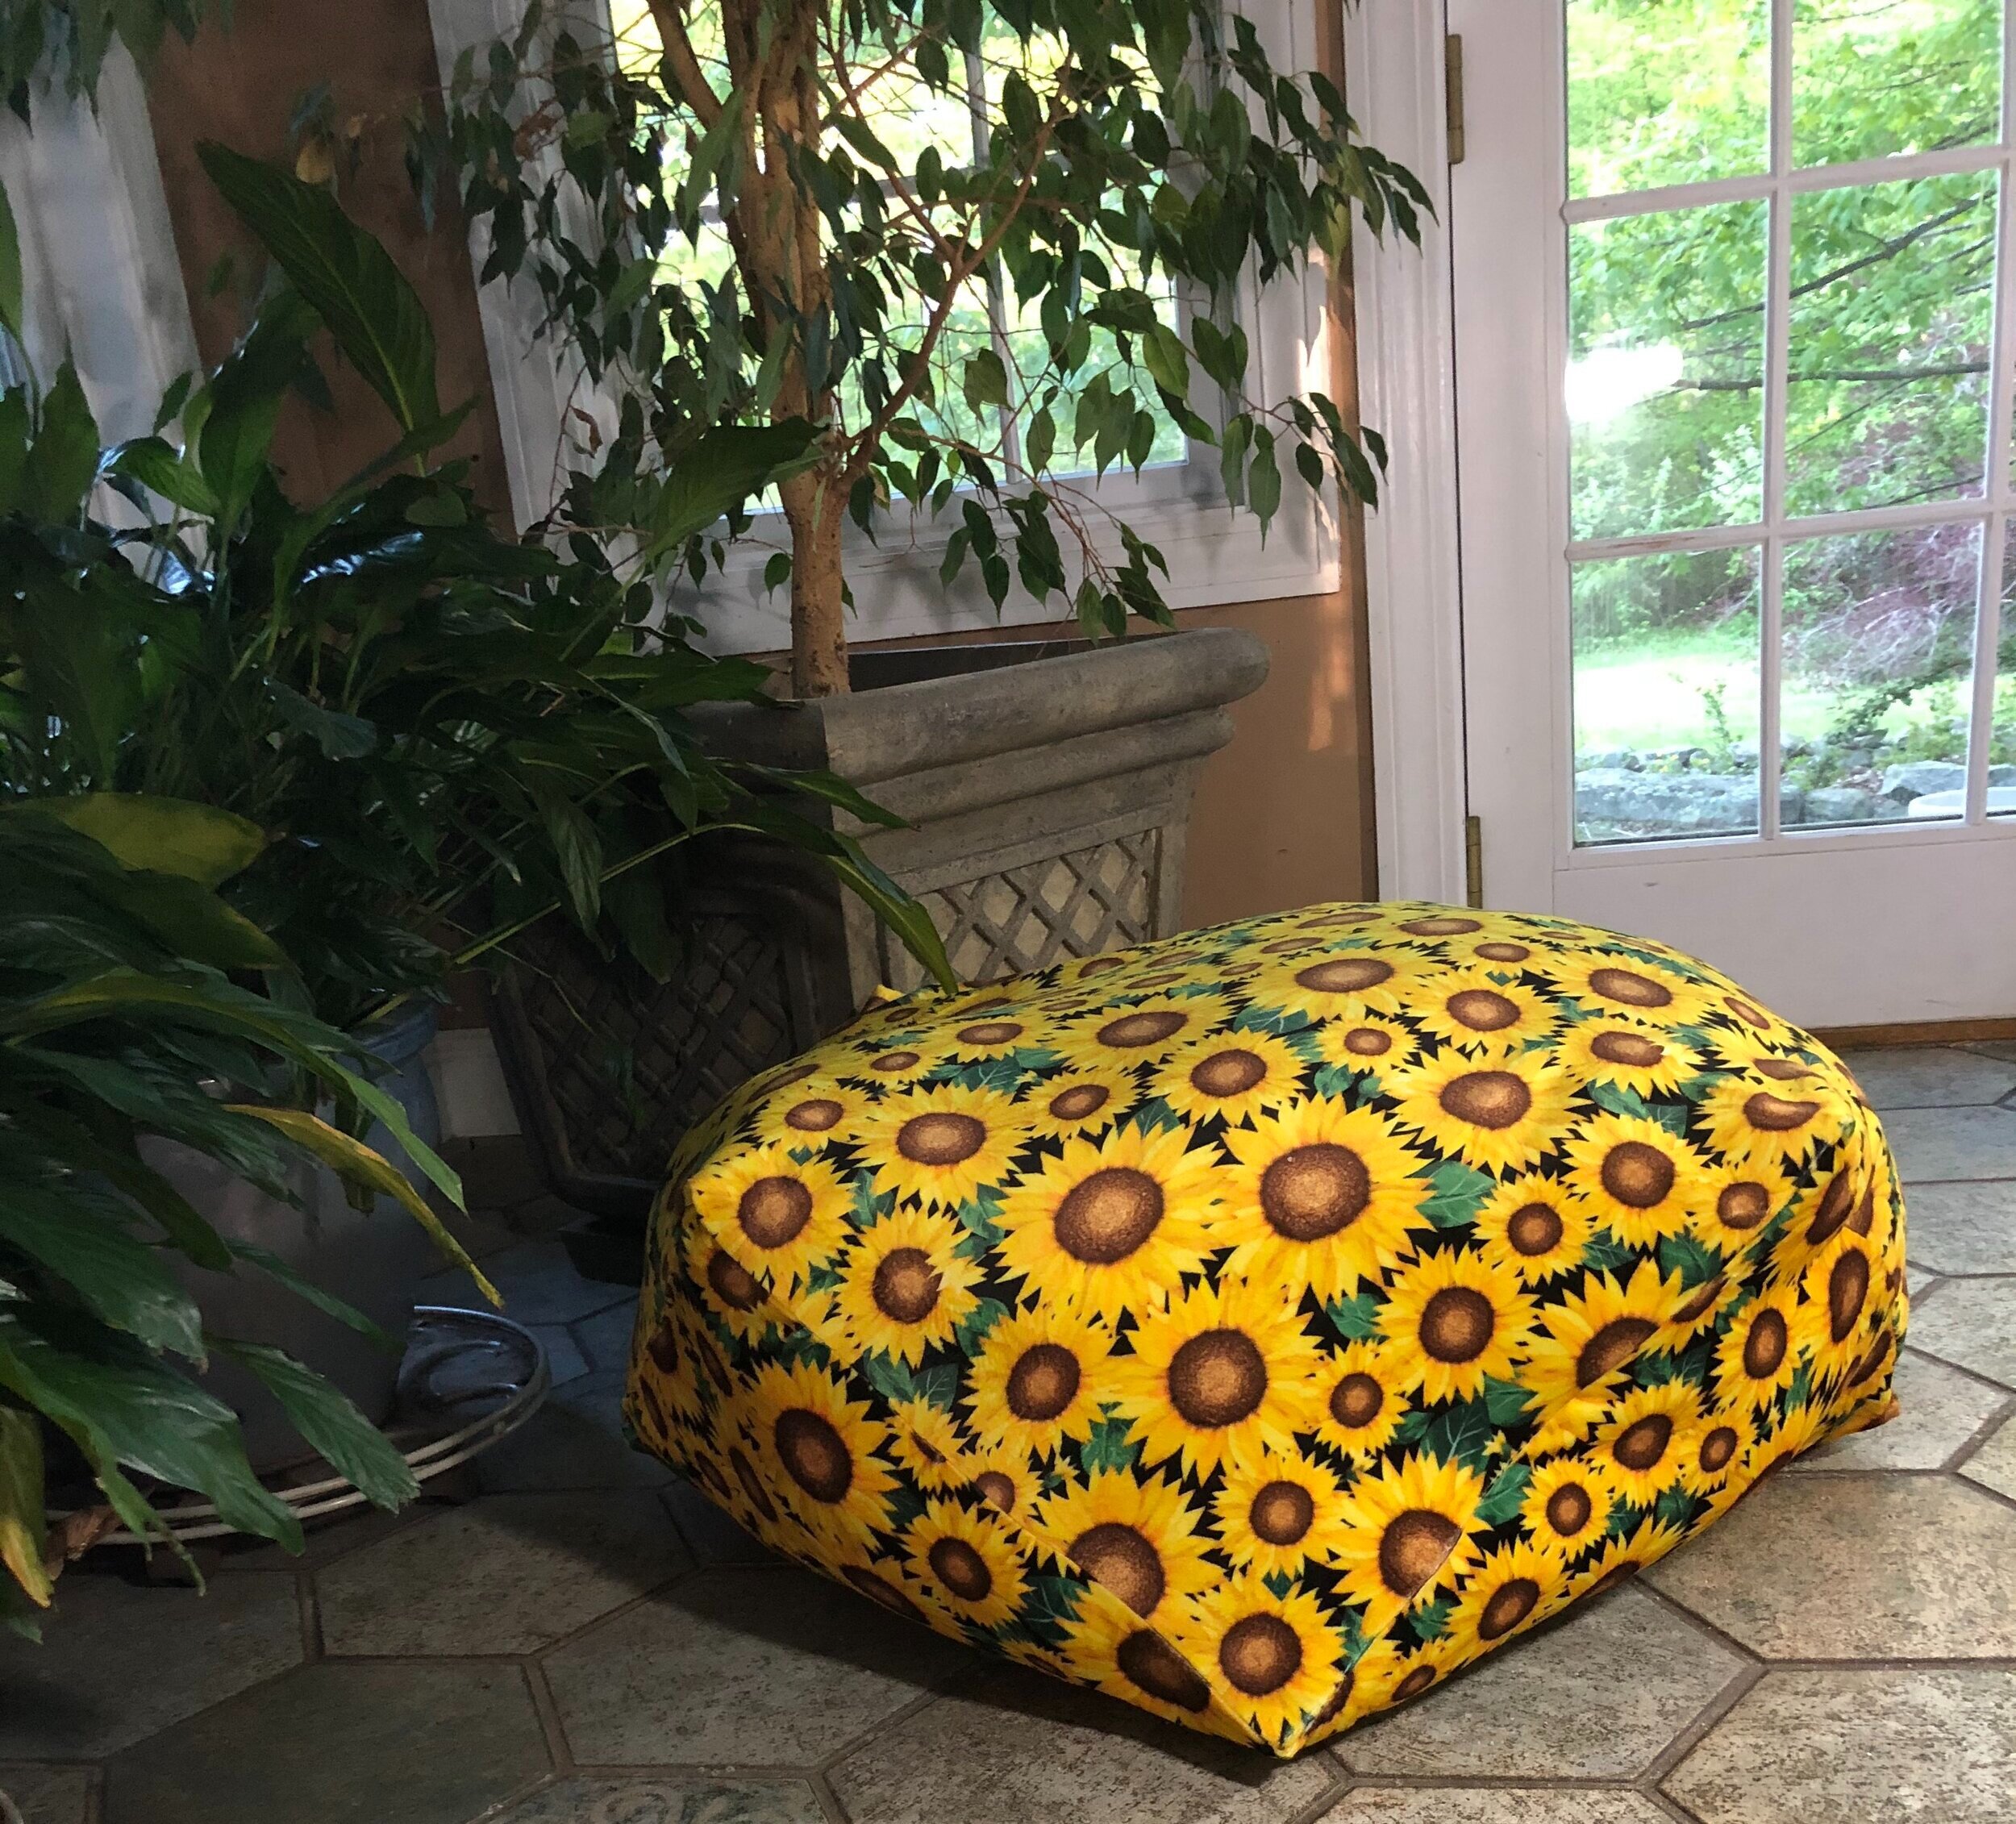
Pillows! We all love to snuggle up with a good pillow, but they are even snugglier (I know – not a word) when they are made with Shannon Fabrics Cuddle® and Luxe Cuddle®. Here is a really fun free pattern to make a large pillow. Use it to prop up in bed or when you need extra seating around the TV. It is adaptable to make into a smaller size too, but with two yards of fabric you get this darling 3D octagon pillow.  This is not the flat octagon that quilters think of. This pillow has eight corners. 

IMG_4305.jpg


MATERIALS

IMG_4289.jpg

2 yards of Shannon Fabrics Cuddle® or Luxe Cuddle®

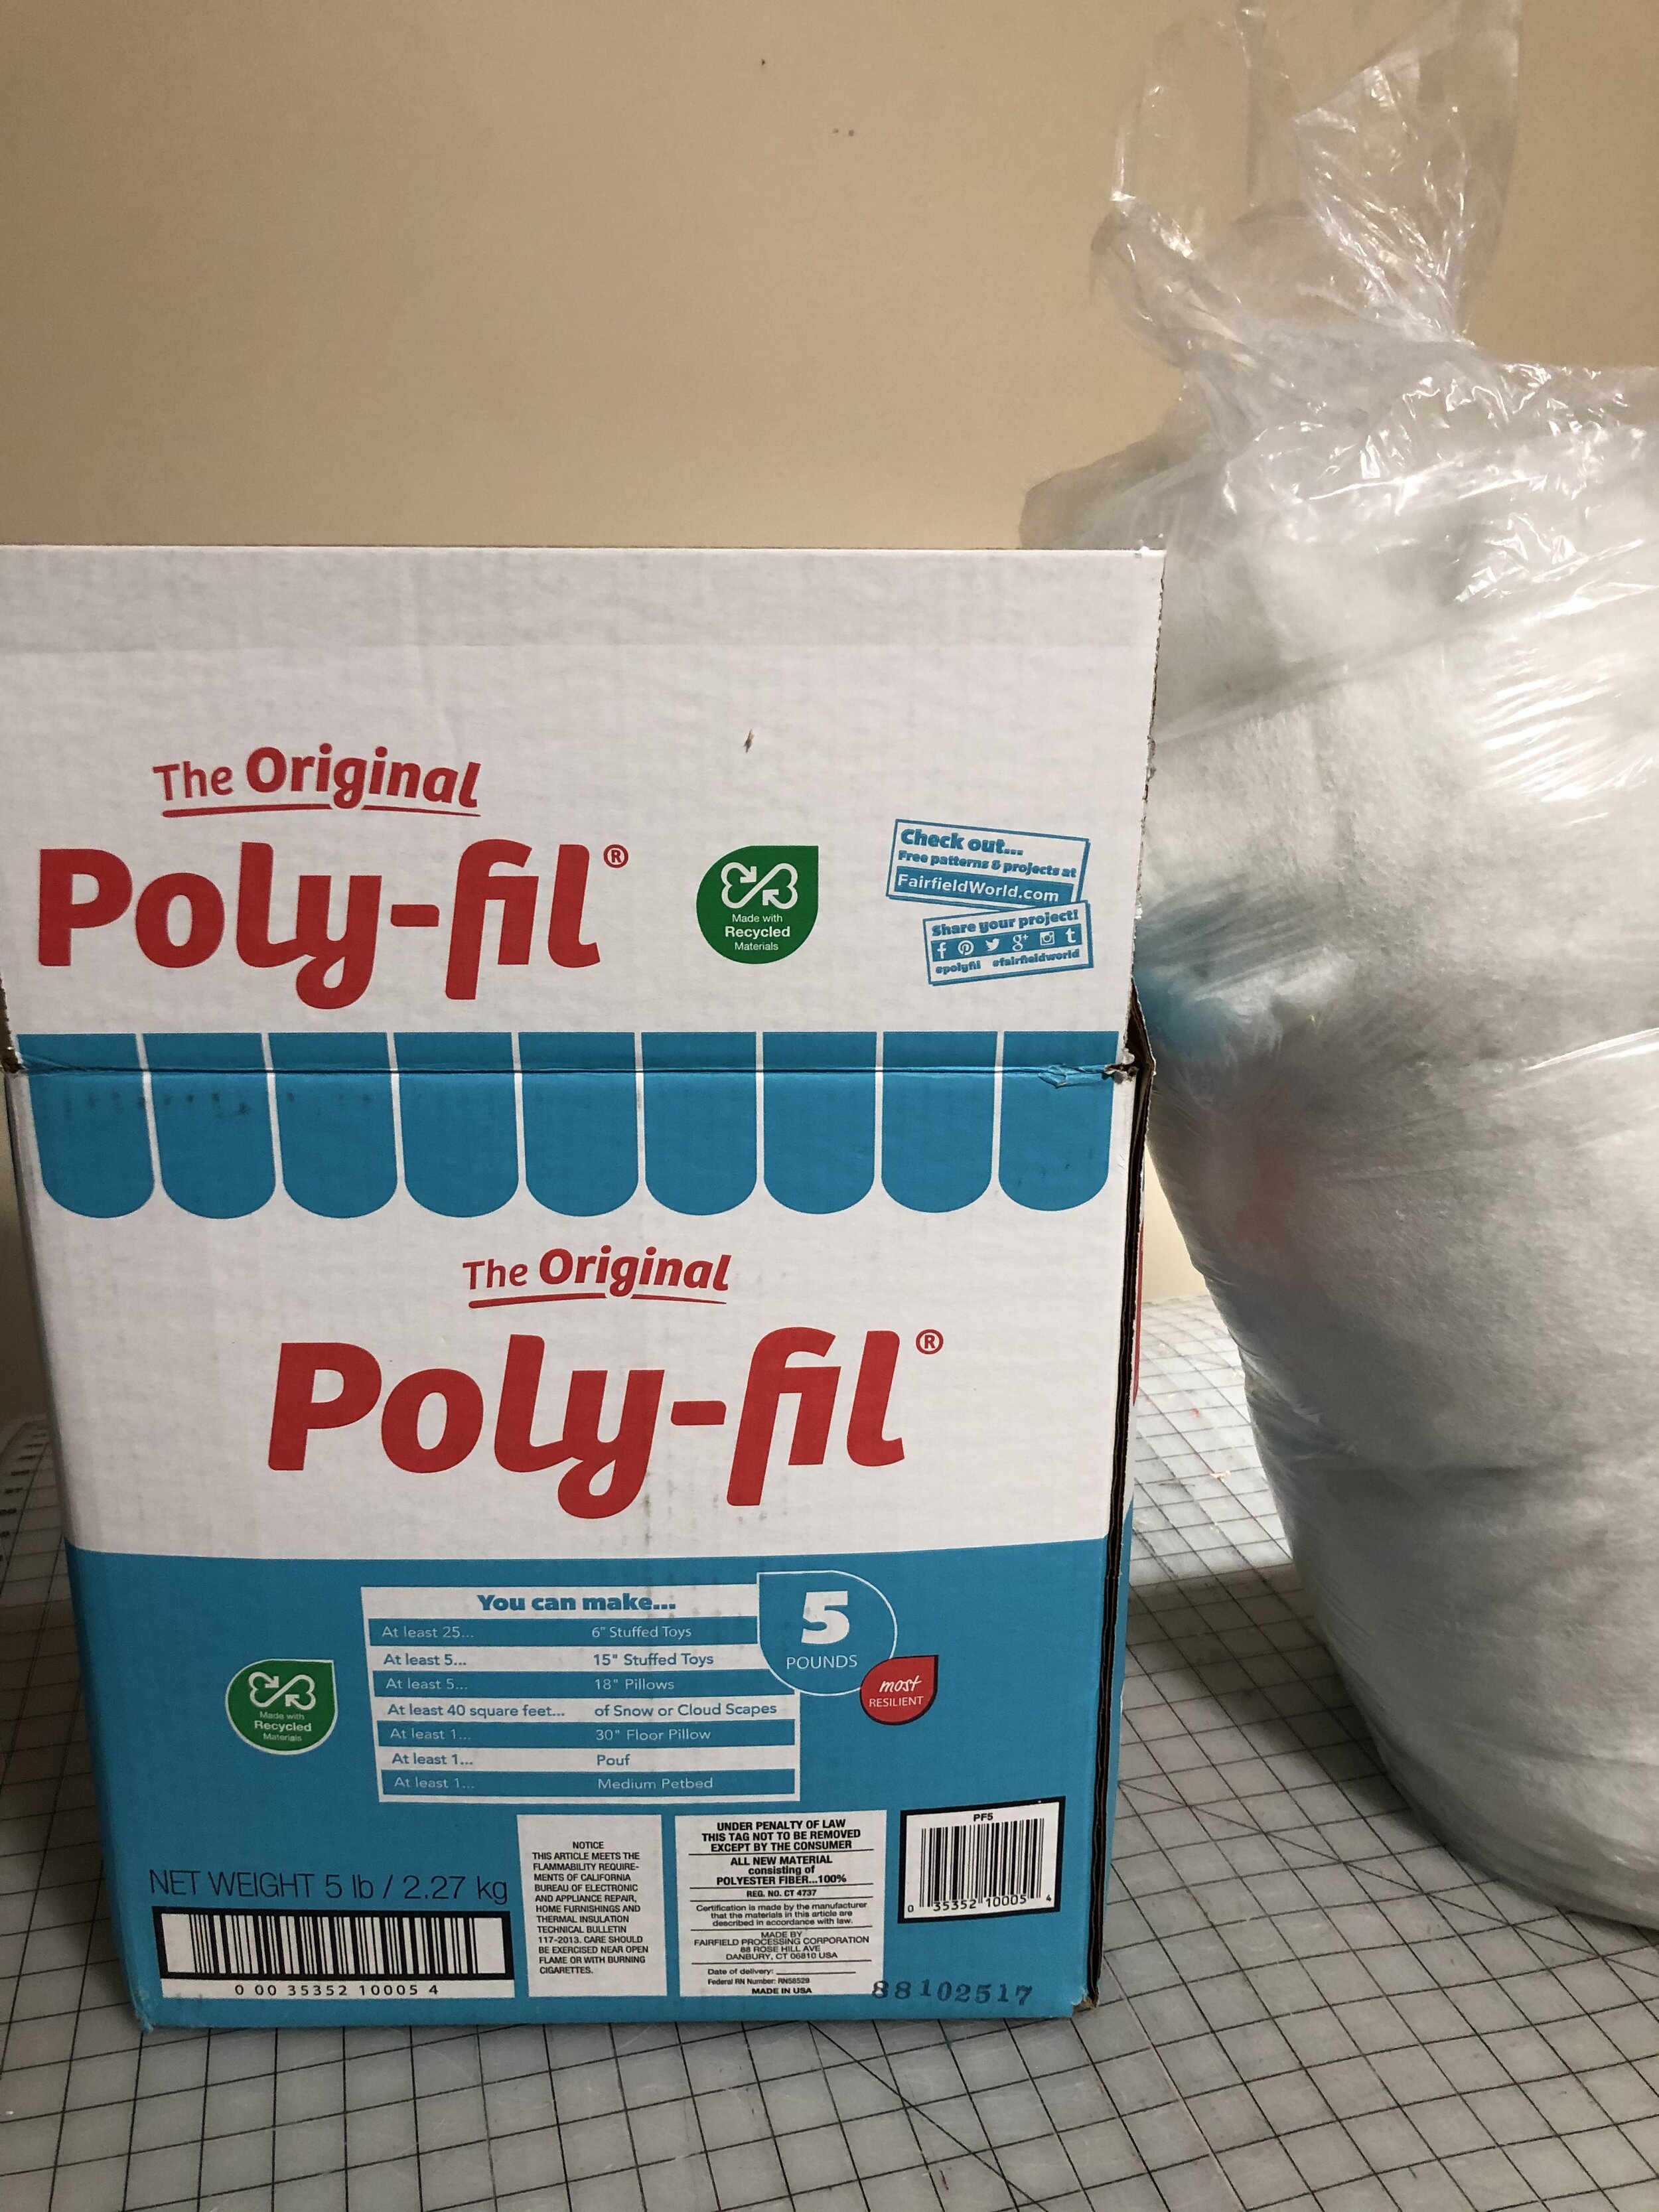
5 pounds of Poly-Fil from Fairfield World

Marking Pen

Corner turner

Matching Good Quality Polyester Thread (not cotton)

Long Flower Head Pins

Walking Foot 

 INSTRUCTIONS

 STEP 1 PREPARATION - CUTTING

IMG_4258.jpg

Cut the 2 yards in half. They will now be 2 pieces of fabric that are 36” by the width of fabric

IMG_4259.jpg
  • Remove the selvage

IMG_4260.jpg
  • To make an even square, fold the 36” at the corner to match the width of fabric. This will form a triangle.

  • Cut along the straight line where you can see the back side of the fabric and the inside of the fabric (see photo).

  • Do this with both pieces of fabric. You now have 2 square pieces of fabric

IMG_4263.jpg
  • Fold each square in half. With a marking pen, mark the half way along each edge. Do this for both squares.

IMG_4265.jpg
  • At the place that you have marked, cut a 3/8” straight slit. Do this on all four sides for both squares

STEP 2 SEWING

  • You are going to sew each of the eight sides individually. To achieve perfect corners, sew each side separately.

  • For the first side, match a corner of one square to the inside of the slit on the other square.

IMG_4269.jpg
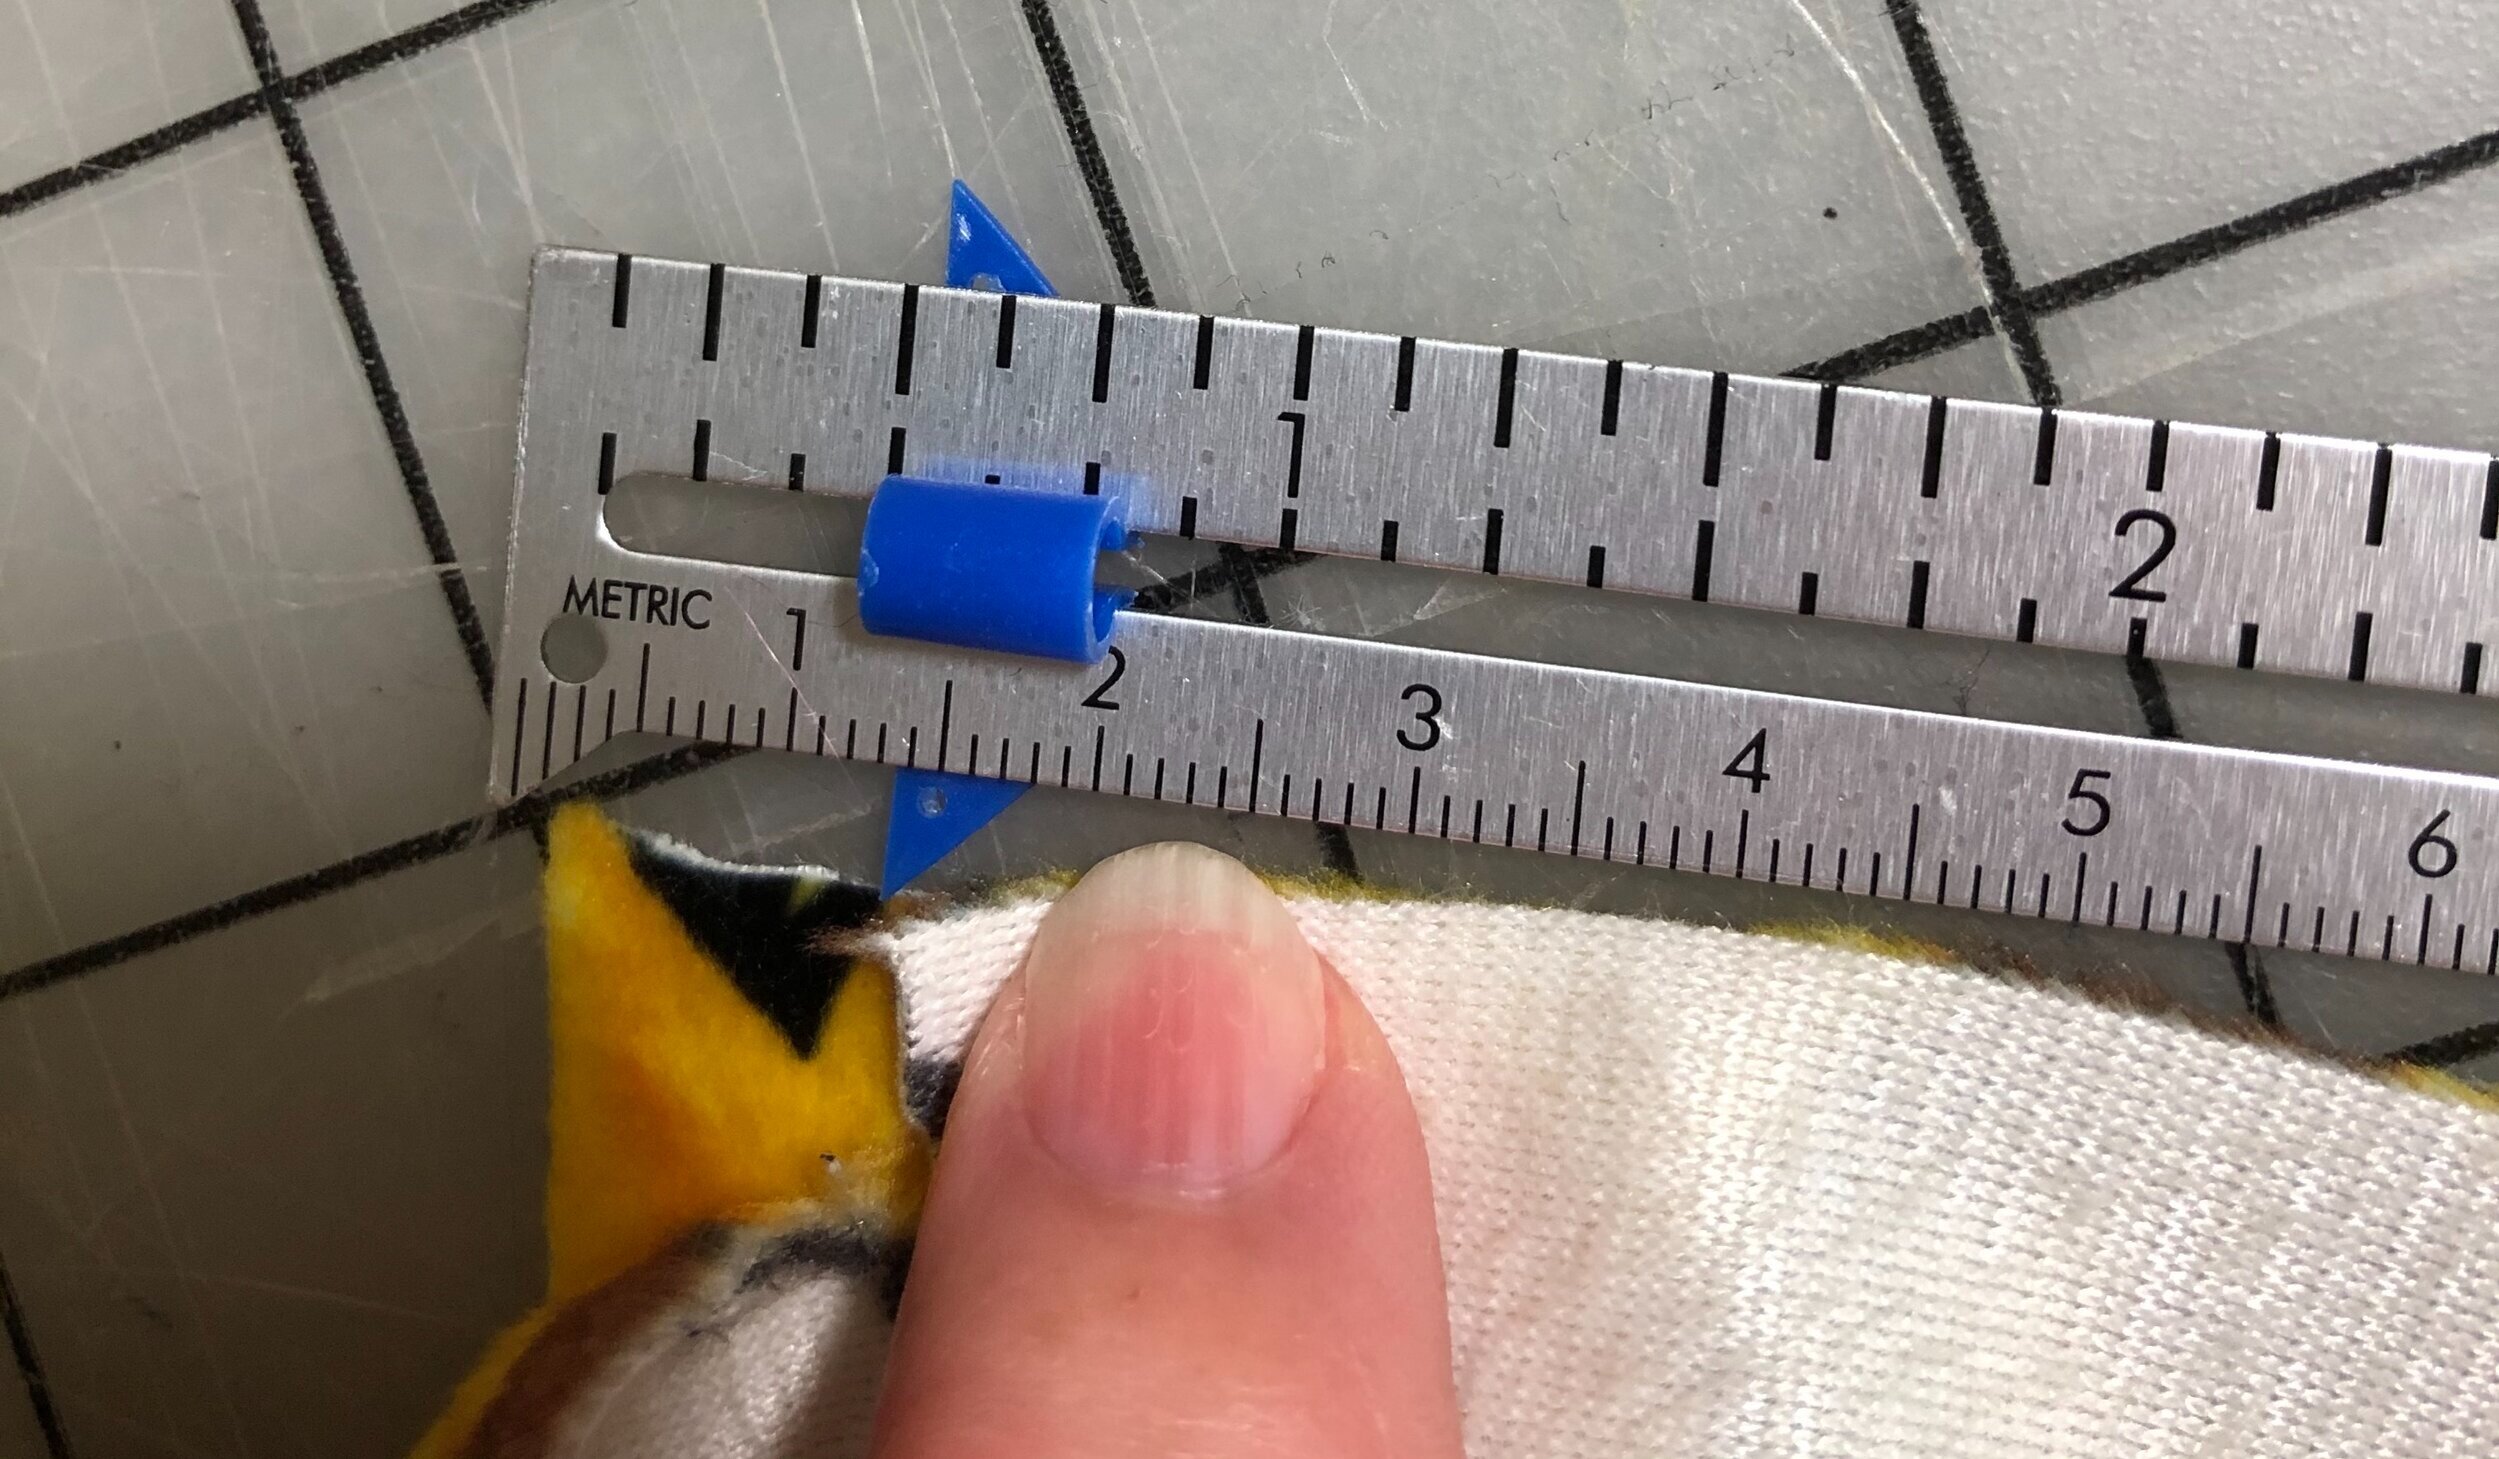
  • Place the corner 1/2” from the slit and pin.

IMG_4270.jpg
  • Follow the edge along until you reach the other corner and slit. Match this corner with the slit on the other square. Pin.

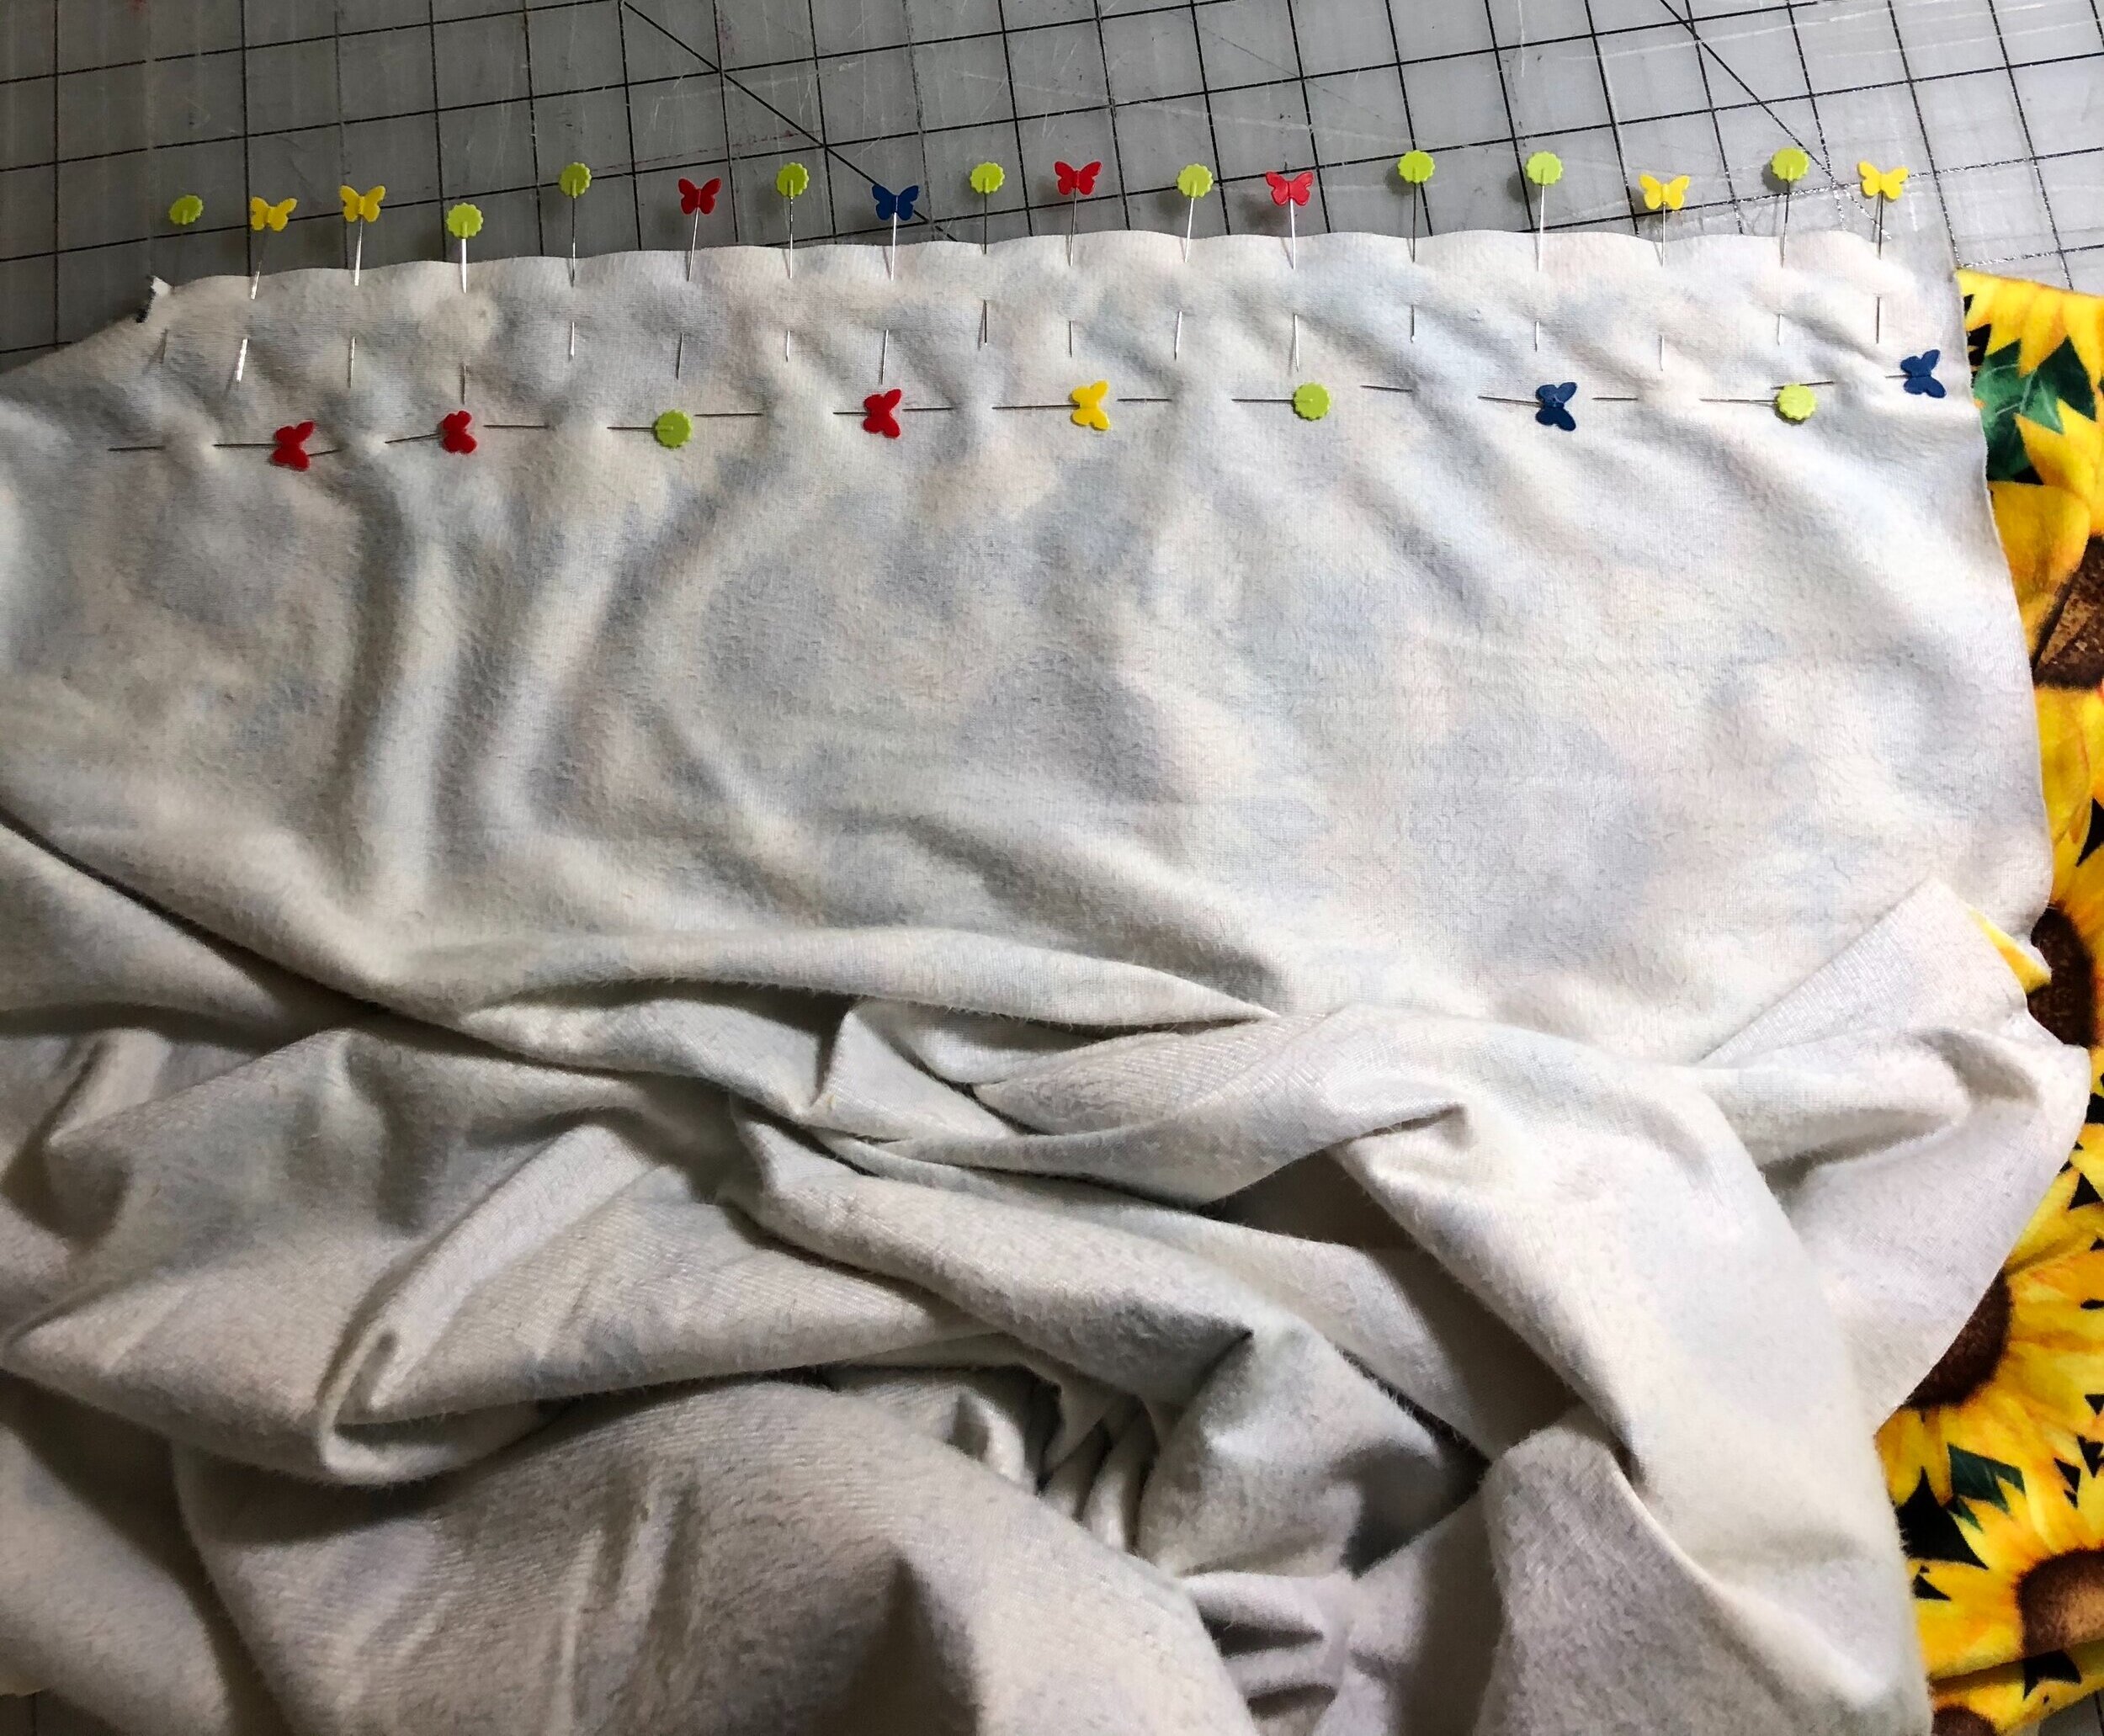
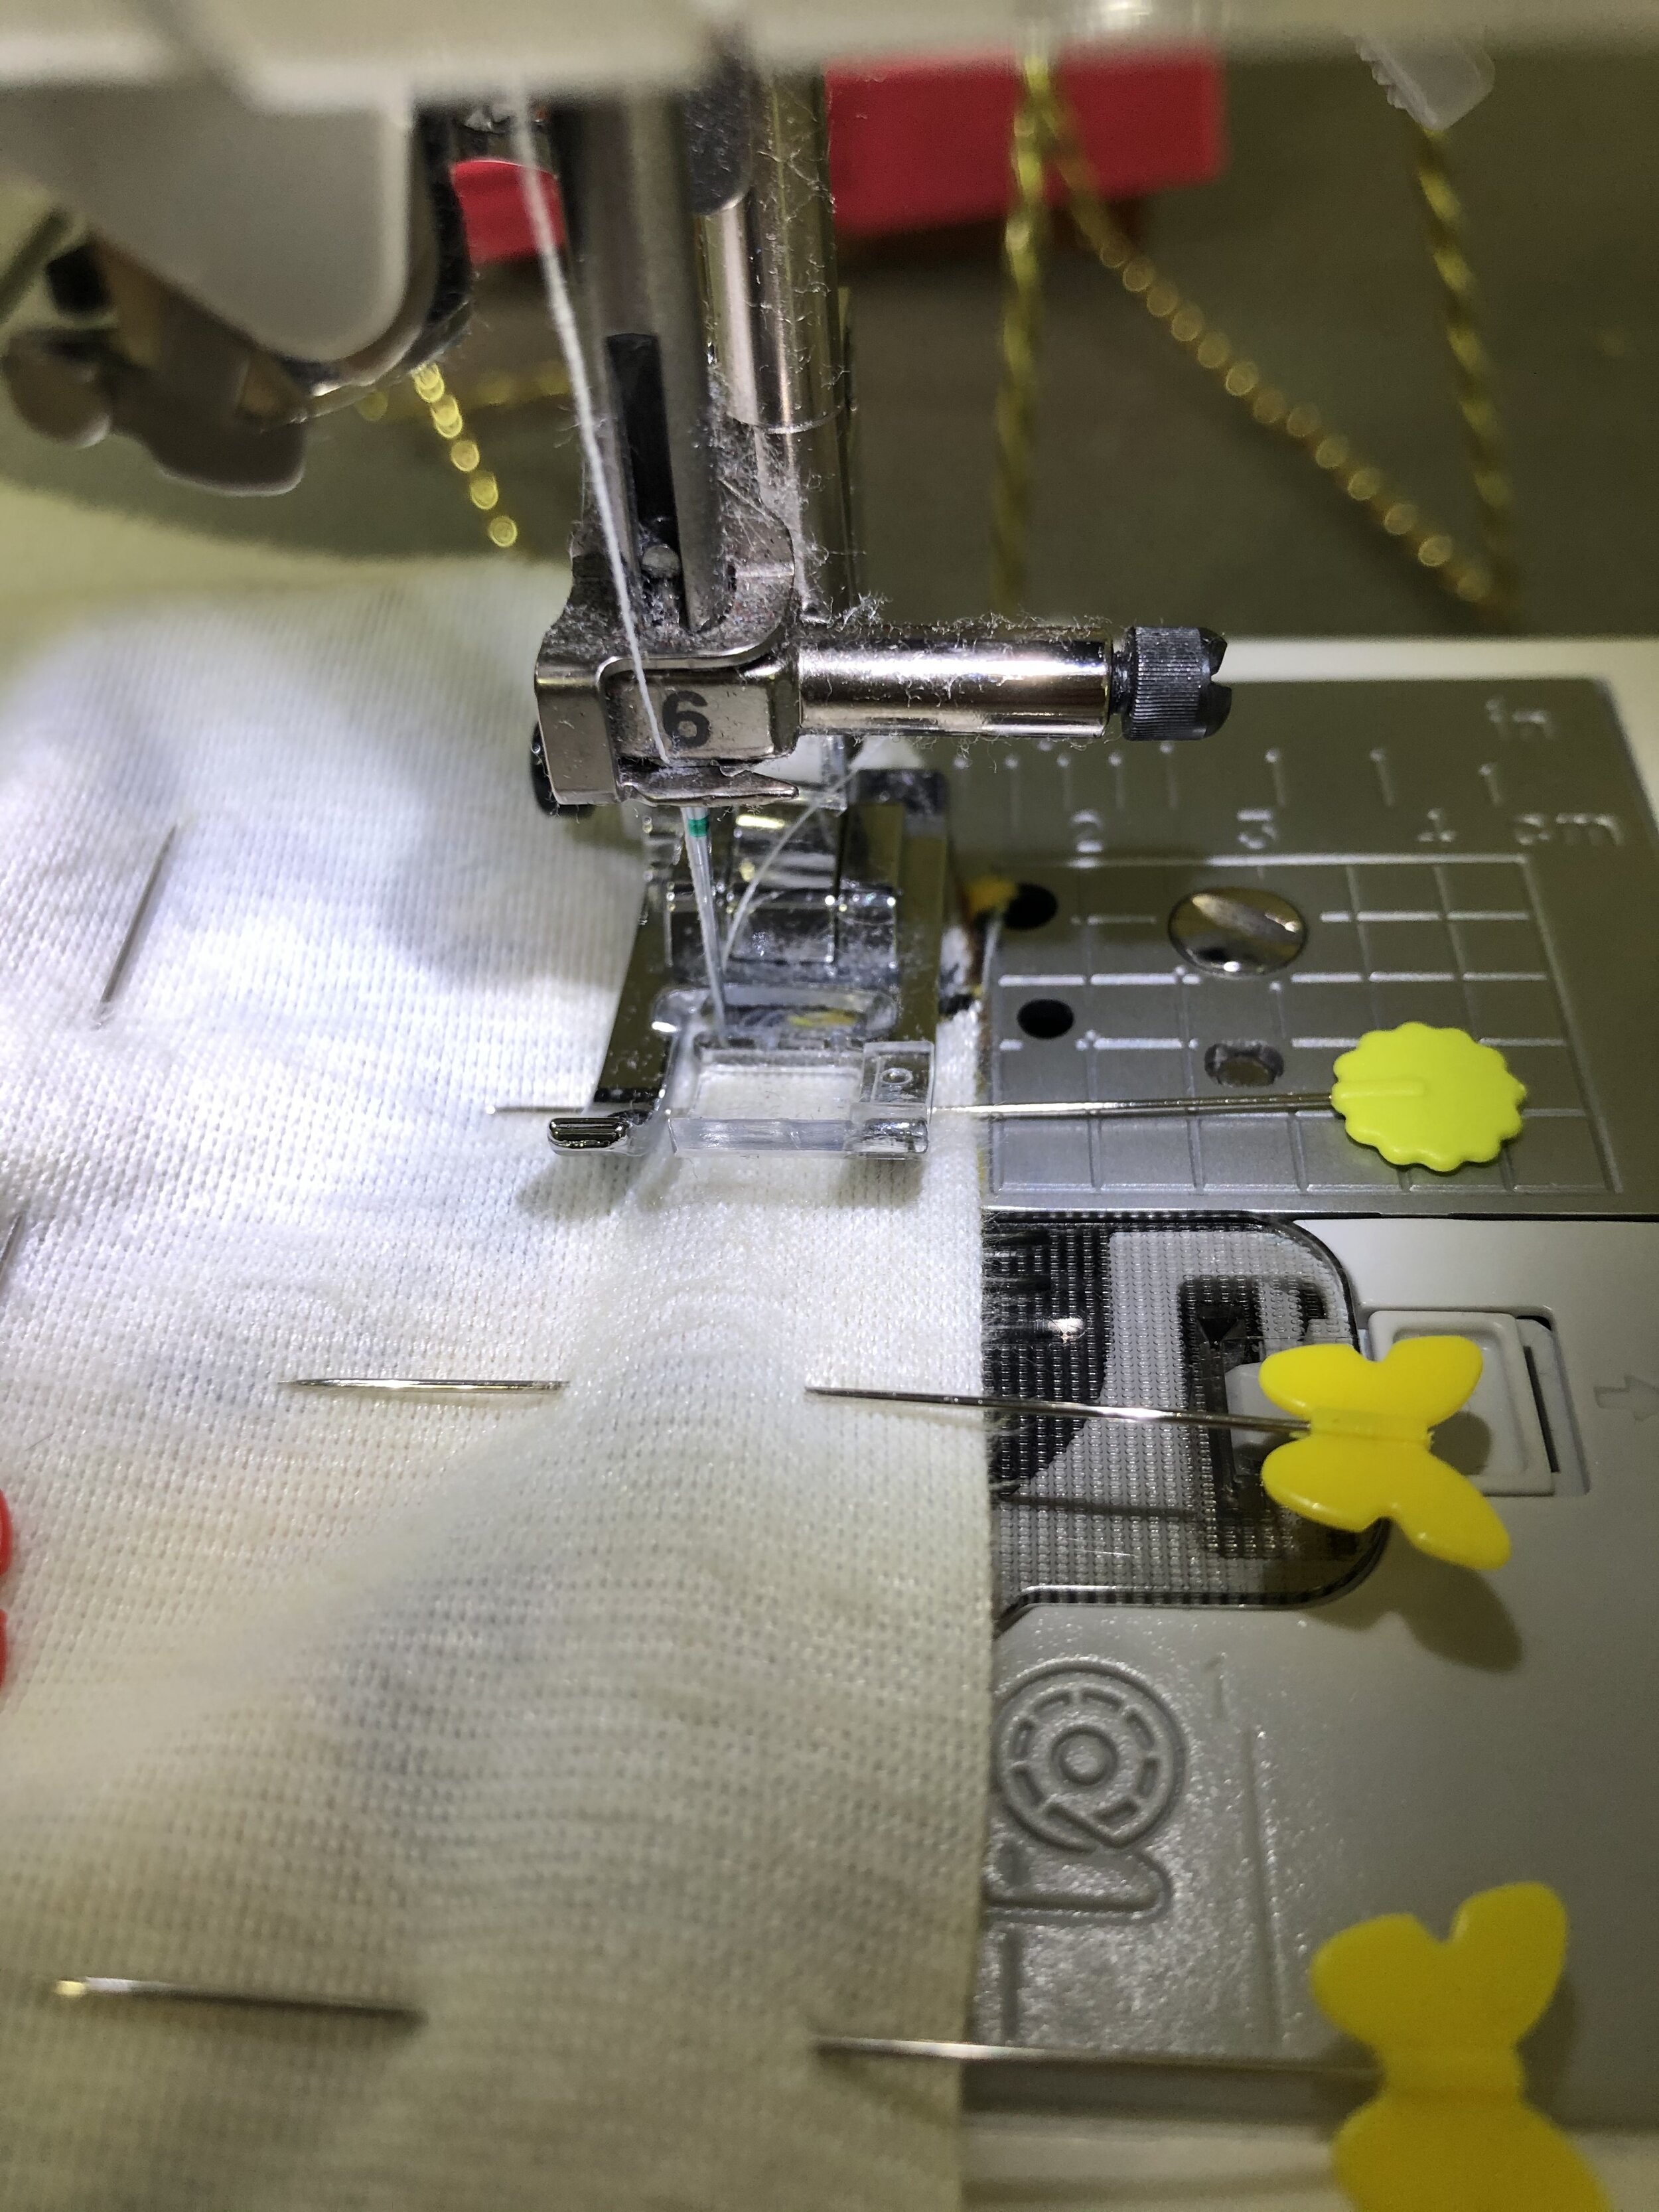
  • Smooth out the fabric on a firm surface. One edge may appear longer than the other. Ease the two pieces together such that they are the same size. Do not stretch them. Pin by the half-way method…pin at the half-way point, then keep pinning half-way between each pin until the pins are about 1” apart.

  • Now pin along the bottom of the pins in a horizontal direction. This is a unique double pinning method devised by Shannon fabrics to prevent stretching.

IMG_4271.jpg
  • Now sew that edge with a 1/2” seam allowance.

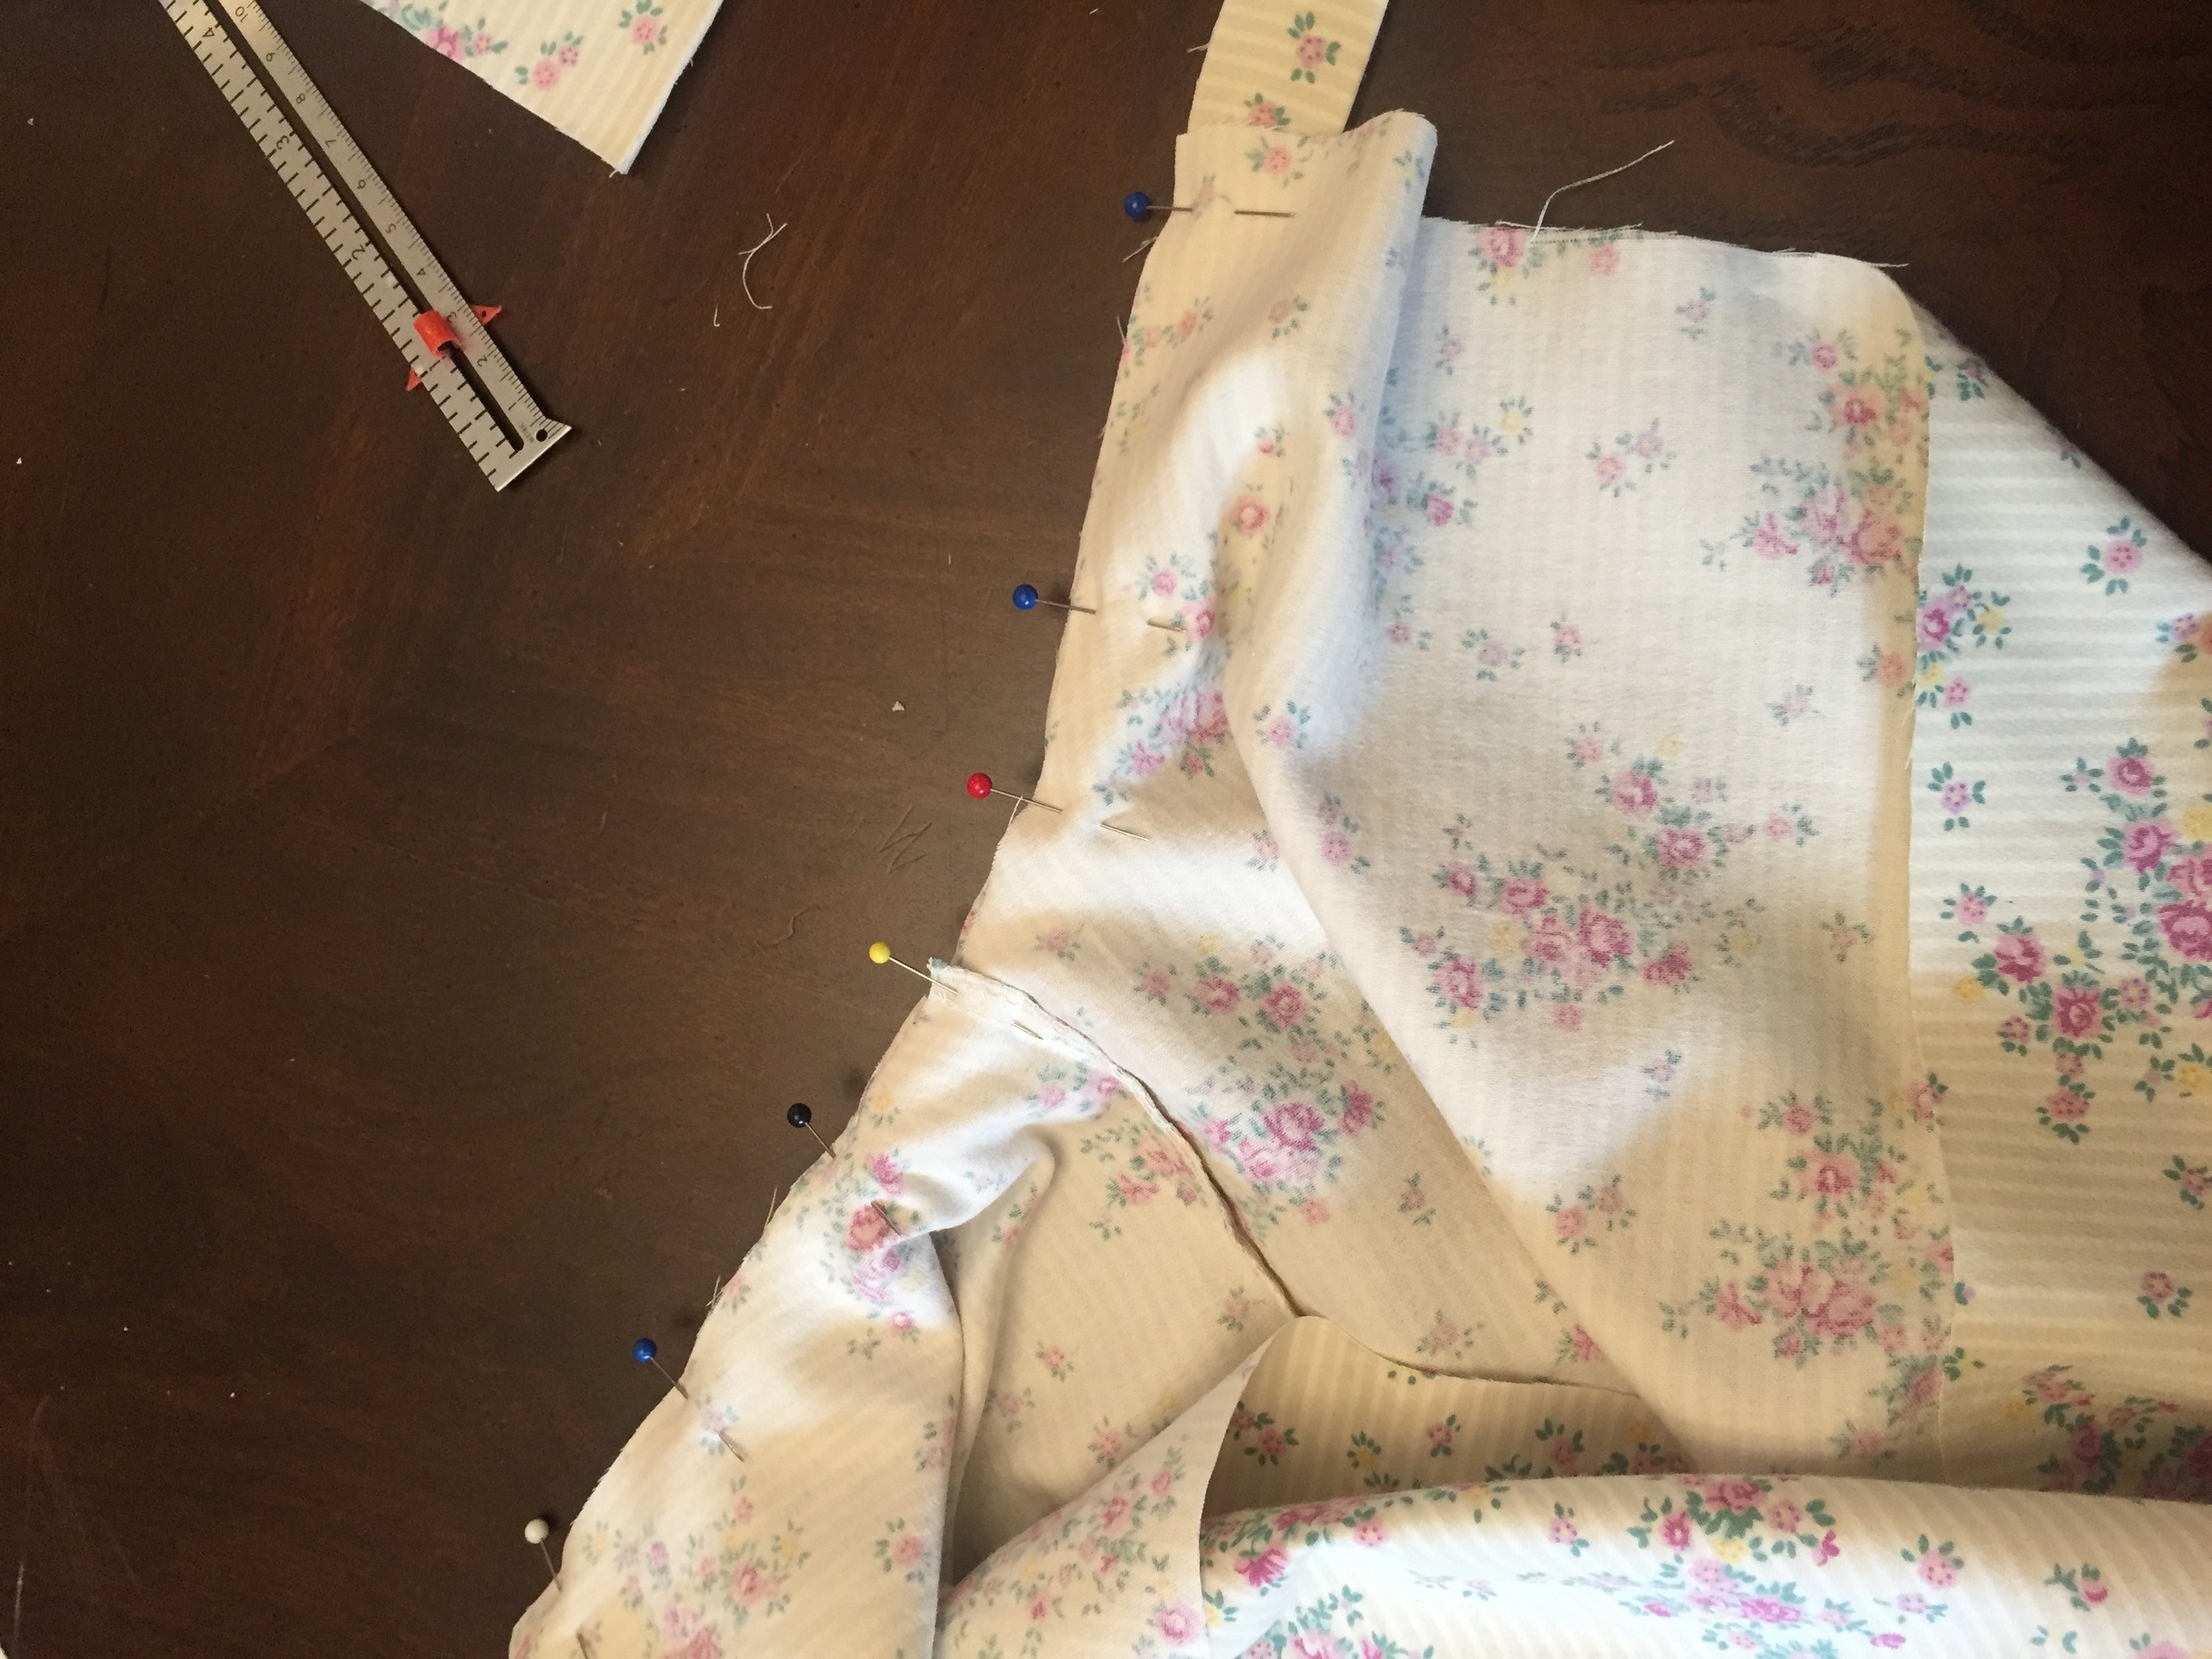
  • Laying your fabric flat find the next edge to the right of the edge you just sewed. Place the corner that you just sewed 1/2” from the corresponding slit. You will have a pucker in the corner. This is needed to make the corner when it is turner right side out. End at the slit, which should be 1/2” from corner edge.

  • Pin this new edge in the same manner as the first edge.

IMG_4274.jpg
  • When you begin to sew, place your needle in the last stitch. Make sure that the pucker does not get caught in the stitches. Pull it down and free from your seam.

  • Sew all eight sides in this way.

IMG_4286.jpg
  • However, for the last side leave a minimum of 5” not sewn for the opening.

STEP 3 TURNING RIGHT SIDE OUT

IMG_4287.jpg
  • Trim the corners, checking each one that they are completely stitched together and have no puckers. Adjust where necessary.

  • Turn right sided out.

  • Push the corners out.

STEP 4 FILLING

IMG_4290.jpg
  • Fill the pillow with the entire box of poly-fill through the opening.

STEP 5 FINISHING

IMG_4291.jpg
  • Fold the opening at the 1/2” line and pin.

IMG_4292.jpg
  • Zigzag the opening closed.

ENJOY your new pillow! Make any size square of fabric into a fun 3D octagon pillow.

IMG_4303.jpg

Oly-Fun™ Metallic Piping

Thank you to "Fairfield Processing" for providing the Oly-Fun™ Metallic for this blog post. I am so grateful that you donated some, as I have now fallen in love with it.

Oly-Fun™ Metallic is an innovative craft material that in every way resembles fabric.  It even comes on a bolt. If you love bling, you will love this. It is ideal in a cutting machine or in crafts that you do not want to sew. It is easy to sew and does not fray. It can be spot cleaned. It is available at local craft/sewing stores. The place I see it the most is at the end of an aisle at Hobby Lobby.  They have all the wonderful array of the basic colors as well as the four metallics in gold, silver, red, and a gorgeous rose gold.

Oly-Fun™ Metallic in luscious colors of gold, rose gold, silver, and red

Oly-Fun™ Metallic in luscious colors of gold, rose gold, silver, and red

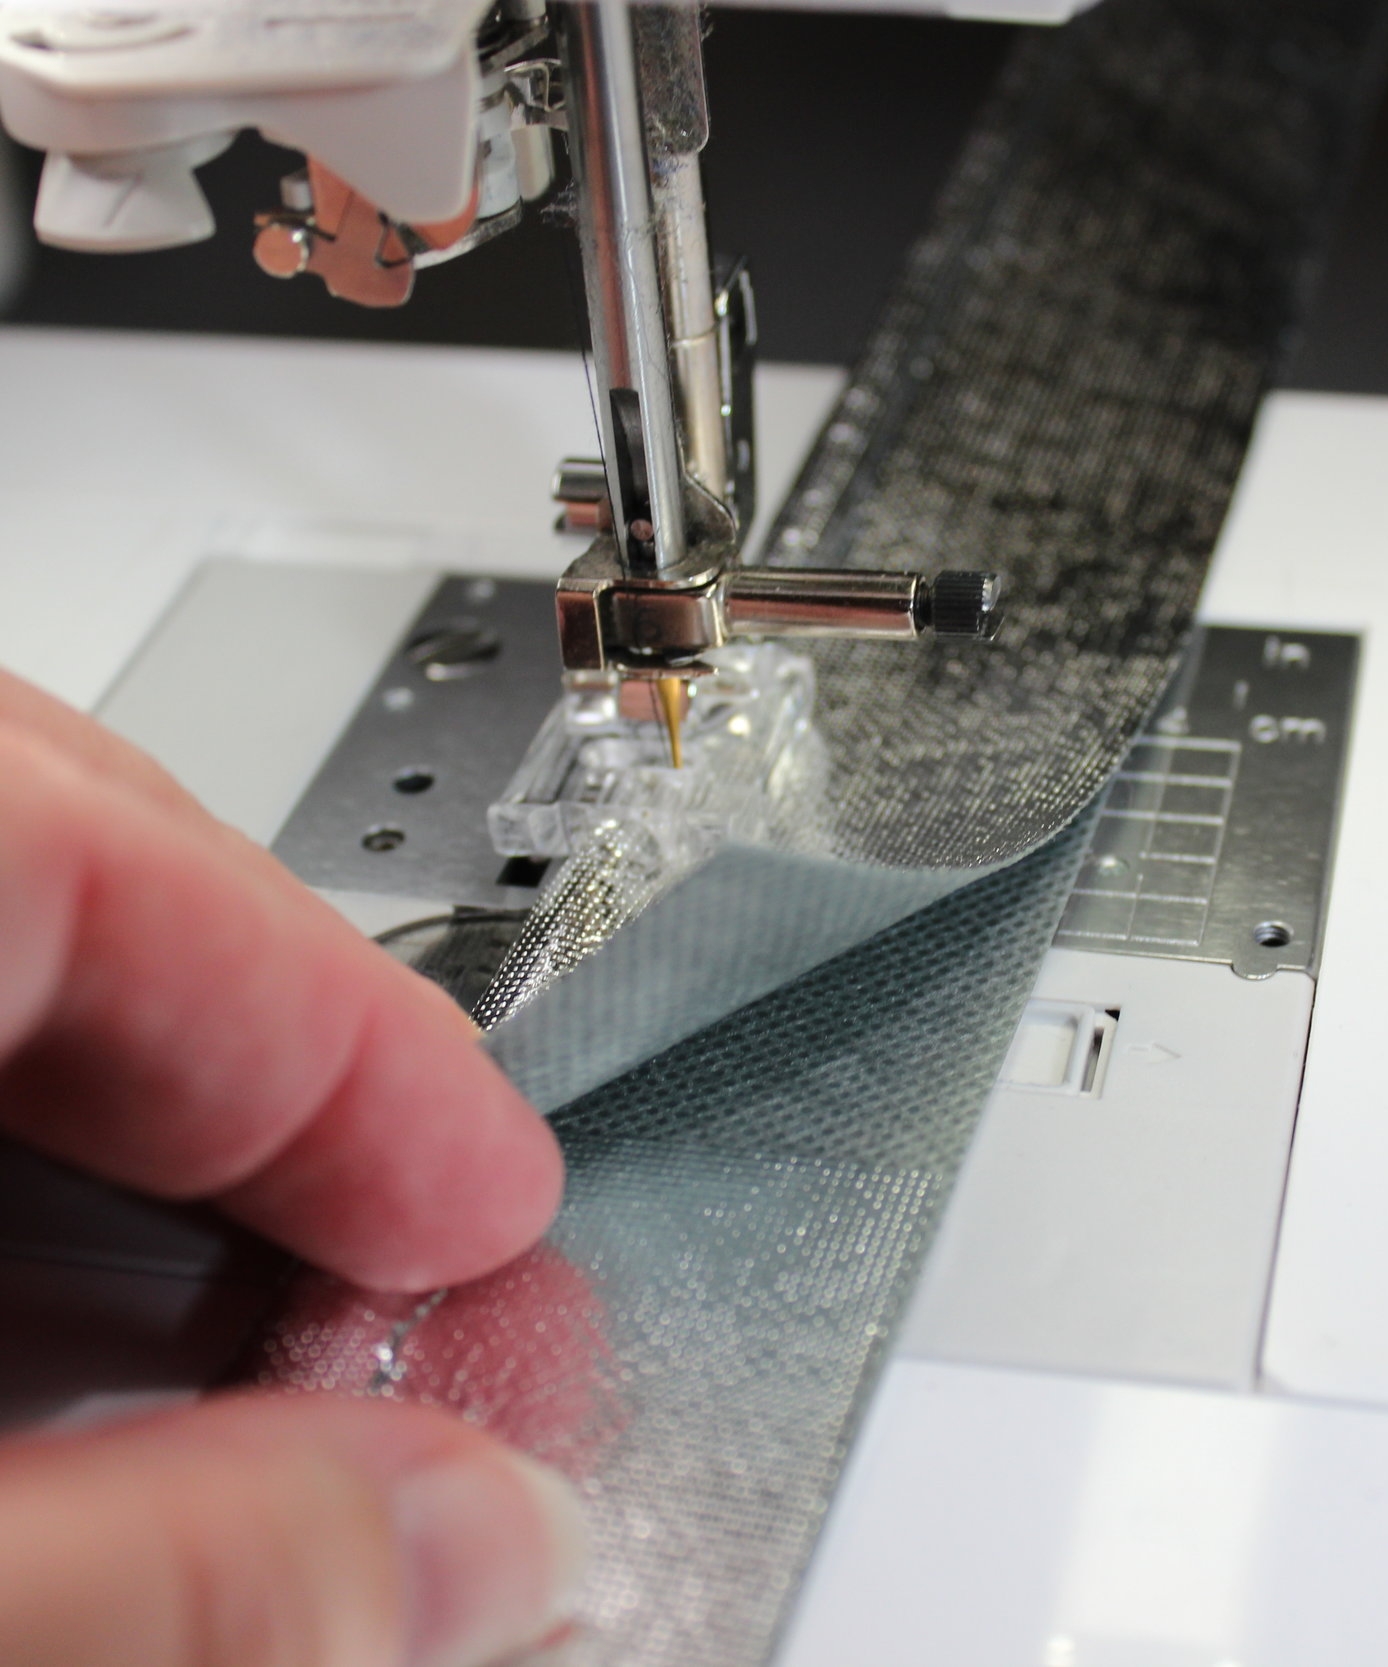
Since Oly-Fun™ Metallic is so similar to fabric I wanted to put it to the test and see how well it would do under pressure. I made piping out of Oly-Fun™ Metallic for a project that is upcoming. It worked beautifully and because it does not fray, I decided to try making a longer piece without a seam. It was great! Instead of sewing the two ends together like traditional fabric, you pick up one end and slide the other end underneath, pull it tight under the binding foot and continue sewing.  It was a breeze to sew and saved some time by not having to seam it first. I have instructions below on how to makes piping with Oly-Fun™ Metallic with both methods – traditional method of sewing the seams and the Oly-Fun™ way that does not need sewing.

Traditional piping with a sewn seam

Traditional piping with a sewn seam

Easy piping with Oly-Fun™ Metallic does not need a seam

Easy piping with Oly-Fun™ Metallic does not need a seam

No seam on the left and with a seam on the right

No seam on the left and with a seam on the right

Some things to keep in mind when using Oly-Fun™ Metallic in general:

·      Use “Wonder Clips” instead of pins so that marks are not left in the material

·      Be careful sewing as marks will be left if a seam must be ripped out

·      Be careful that the feed dogs do not leave a mark when the right side will be down against the feed dogs

·      If using it with a stretch fabric, consider placing the piping under the fabric when attaching to avoid puckers

·      While Oly-Fun™ Metallic does not have a grain, it does have a slight texture that should be kept in mind when planning your project

Texture of Oly-Fun™ Metallic

Texture of Oly-Fun™ Metallic

·      Do not bend or fold the material as it will leave permanent creases

Oly-Fun™ Metallic with permanent creases

Oly-Fun™ Metallic with permanent creases

·      Use a sharp needle that is as small as possible so that marks are not seen from the needle

·      Do not use it on a project that will require washing

INSTRUCTIONS

MATERIALS

·      Cording for piping the width and length necessary for your project (pictures are 3/8” cording and 12” long)

3/8" cording used for this tutorial

3/8" cording used for this tutorial

·      Oly-Fun™ Metallic - cut the width to be the circumference of the cording plus 2” if you are using a ½” seam allowance and the length the perimeter of your project

·      A Piping/Cording foot for your machine is very helpful, but a zipper foot can also be used

A piping foot has a groove to hold the piping

A piping foot has a groove to hold the piping

The piping foot holds the piping/cord in place while you stitch

The piping foot holds the piping/cord in place while you stitch


·      Rotary Cutter

·      Self-healing Cutting Mat

·      A “Piping Magic Tool” is a great help in trimming the piping (www.NancyNotions.com)

STEP 1

Cut your cording and Oly-Fun™ Metallic to the desired length and width. The width of the Oly-Fun™ Metallic should be the circumference of the cording plus 2” if you are using a ½” seam allowance, otherwise, adjust accordingly. This allows for the material to go around the cording and create a margin of fabric on both sides that accommodates a ½” seam allowance. For example, I used 3/8” cording and cut the width to be 2” (the pictures show 3”, but my actual project used 2”).

STEP 2

If you would like to connect your pieces of Oly-Fun™ Metallic the traditional method before piping then, sew the two ends right sides together with ¼” seam allowance (it does not need the bulk and will not fray so a small seam allowance can be used).

Only a 1/4" seam is necessary with Oly-Fun™ Metallic

Only a 1/4" seam is necessary with Oly-Fun™ Metallic

STEP 3

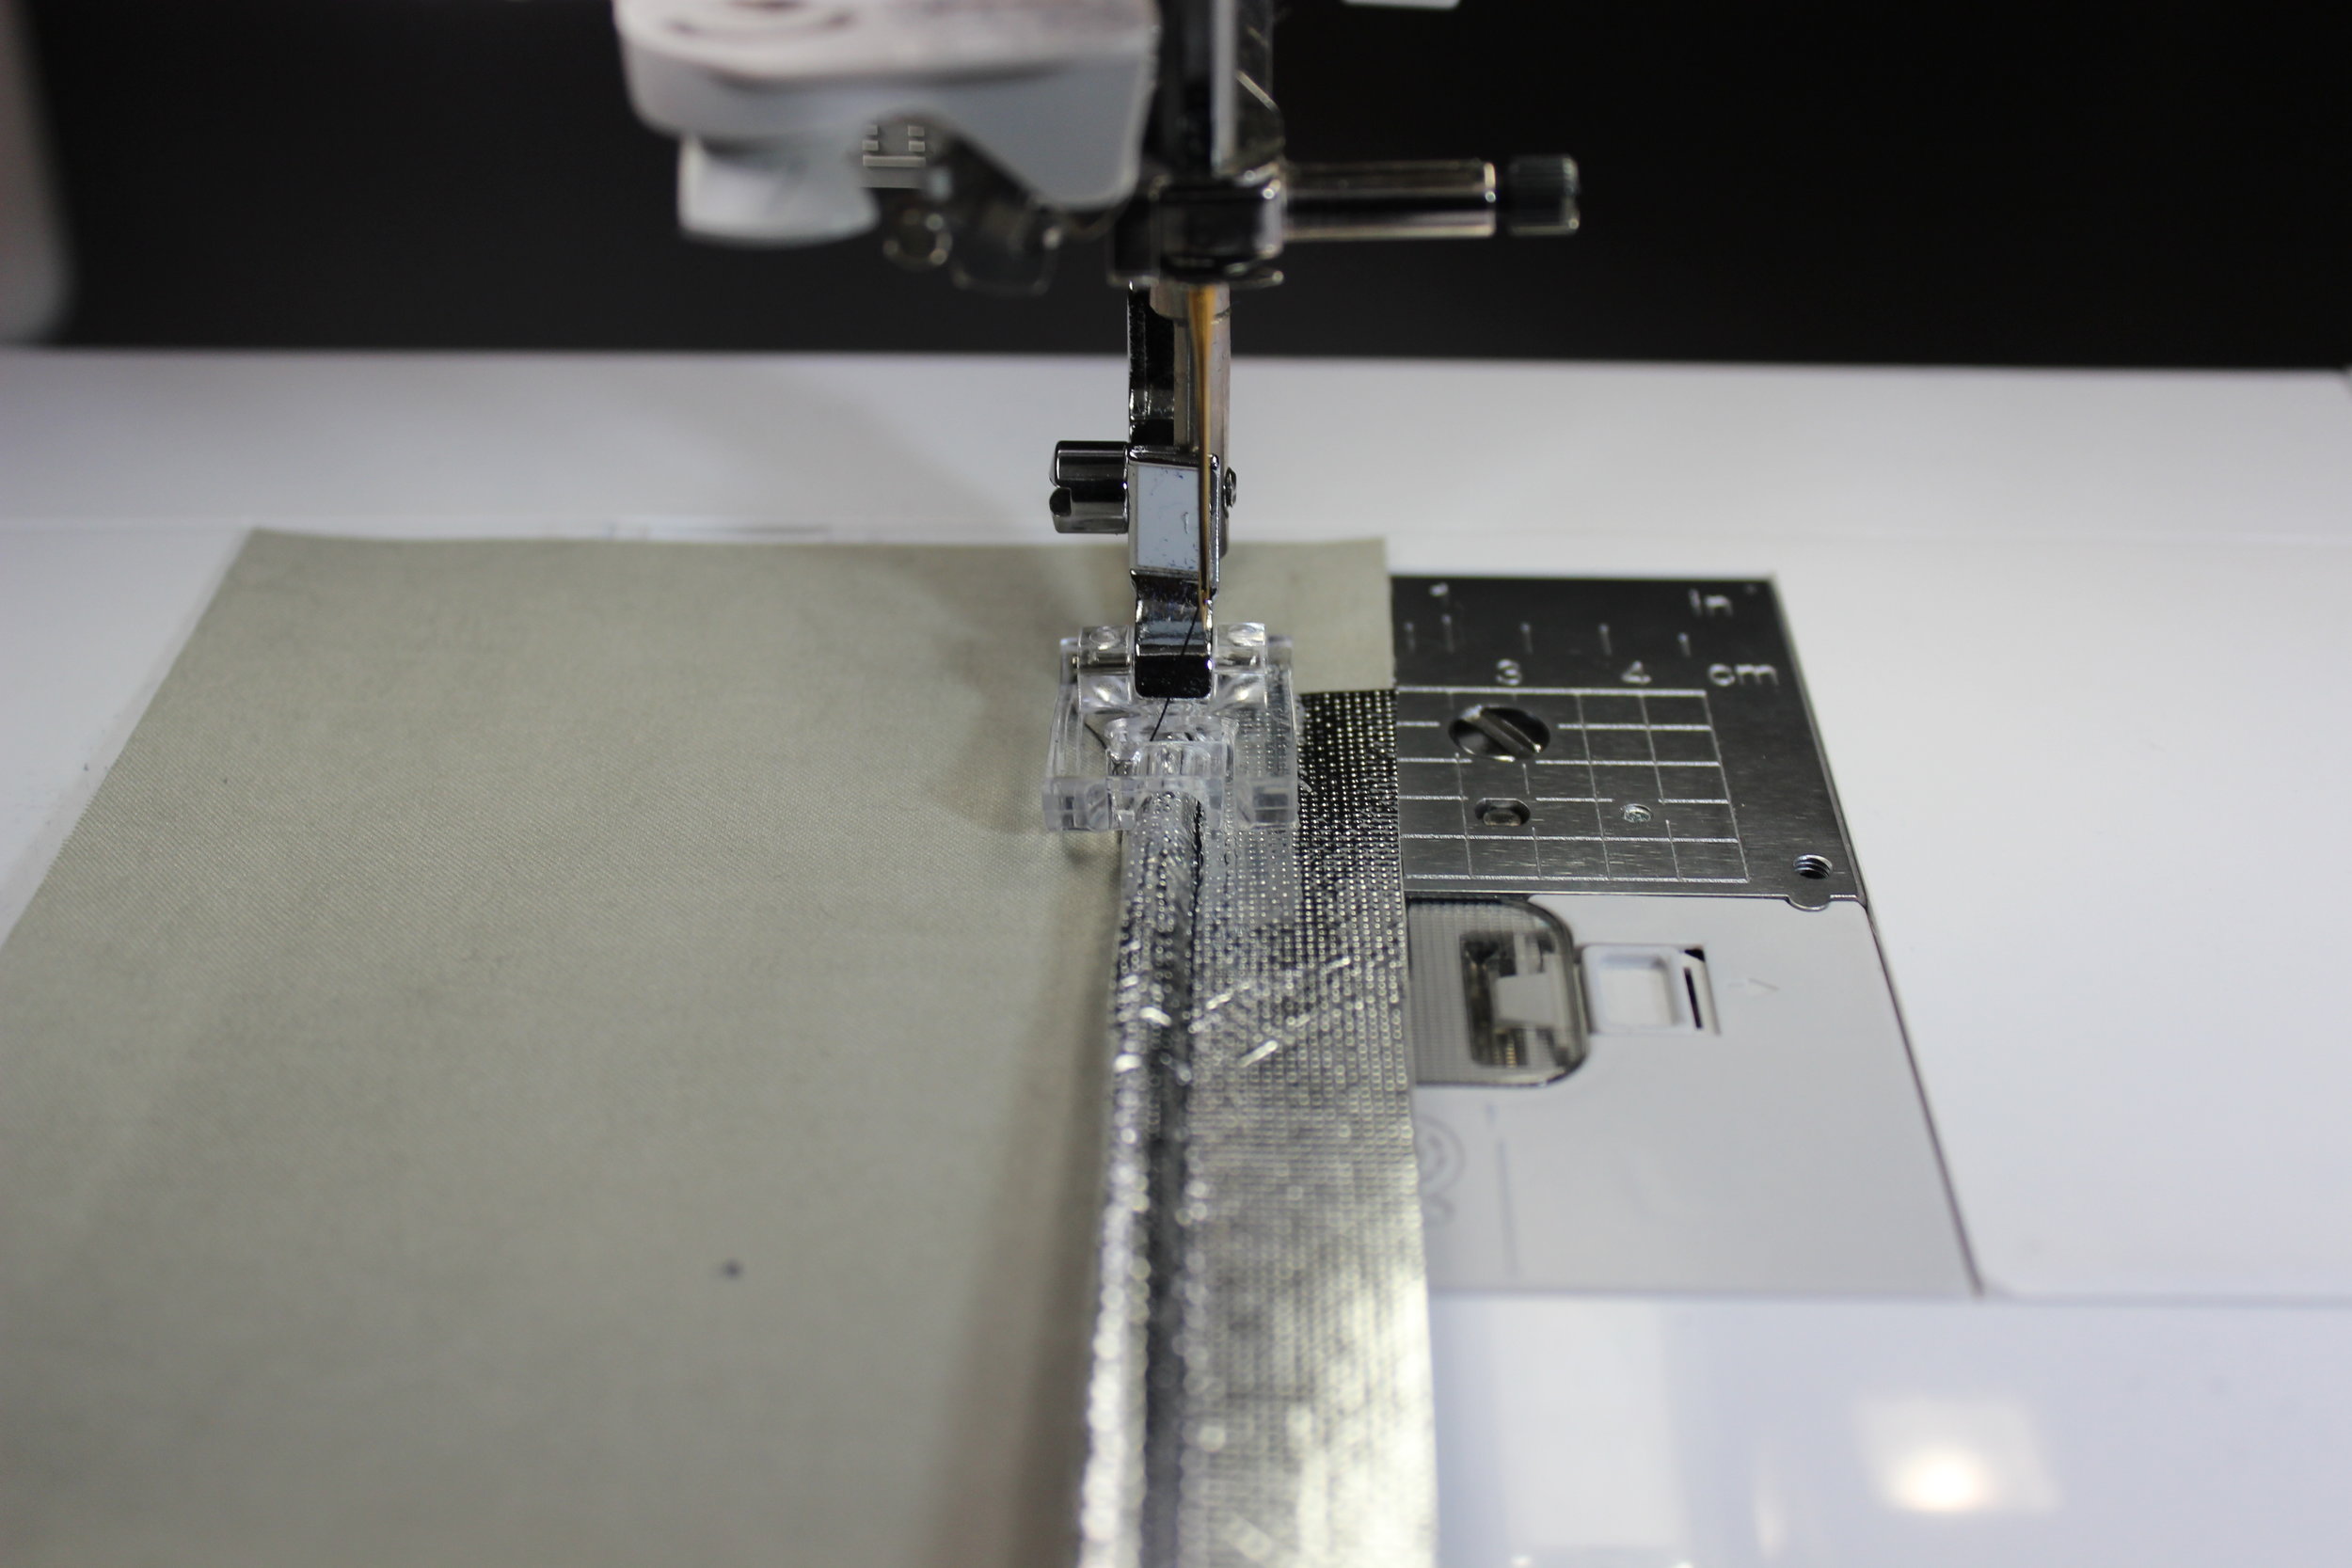
Replace your standard foot with a piping/cording foot.  This foot has a groove that allows the cord to stay in place while you are sewing close to the cord. It is important to adjust the placement of the needle so that the needle lands just to the right of the cord, but does not catch the material wrapped around the cord.

Adjust the needle placement so that it is just to the right of the cord

Adjust the needle placement so that it is just to the right of the cord

STEP 4

Wrap the width of the Oly-Fun™ Metallic tightly around the cord and match the raw edges with wrong sides together.

STEP 5

Slip the cording with the Oly-Fun™ Metallic under the piping foot, pulling the material tight around the cord. Sew with a regular stitch length.

Place the piping foot over the cord and the needle to the right of the cord

Place the piping foot over the cord and the needle to the right of the cord

STEP 6

Stop 2” before you reach the end of the material. Lift the material up and slide the next piece under the first piece about ½”. Place the sewn piece on top and pull tight. Align the raw edges.

Stop sewing 2" before the end of the material and slide the next piece inside

Stop sewing 2" before the end of the material and slide the next piece inside

The material should overlap 1/2" and be tight

The material should overlap 1/2" and be tight

STEP 7

Continue sewing the piping until you reach the end.

STEP 8

At the cutting mat, trim the raw edges of the piping to ½” (or wider if needed for your project). A “Piping Magic Tool” slips over the cording and gives you an automatic ½” seam allowance to allow for easy straight cutting.

Trim easily with a special grooved acrylic ruler

Trim easily with a special grooved acrylic ruler

Trim to 1/2"

Trim to 1/2"

STEP 9

Now you are ready to add it to your project. Follow the pattern guidelines. In general, you place the raw edge of the piping on the edge of the right side of the fabric and using the piping foot, you place the piping under the foot and sew in exactly the same place as before.

Place the piping on the raw edge and stitch with the piping foot

Place the piping on the raw edge and stitch with the piping foot

Then you add the second piece of fabric on top with right sides together. You place the piping under the foot and sew in exactly the same place as before. Fold the fabric back and the piping will be on the edge sandwiched between two pieces of fabric. If your project uses it in a different method, please refer to those instructions.

Add the second piece to the top and stitch again with the piping foot

Add the second piece to the top and stitch again with the piping foot

Finished piping inserted into two pieces of fabric

Finished piping inserted into two pieces of fabric

5 yards of gold piping ready for a great project

5 yards of gold piping ready for a great project

Fairfield Processing has many projects on their website using Oly-Fun™ Metallic. A tray to keep food warm or cold while serving will be posted on their website that includes using Oly-Fun™ Metallic piping. Hope you enjoy it!

Officially a Brand Ambassador for Shannon Fabrics

It’s official! I am so excited to announce that I am a brand ambassador for Shannon Fabrics. Last week I spent an amazing three days just outside Chicago, Illinois, at the incredible Bernina Center.

Some of the Shannon Fabrics' executives, representatives and band ambassadors

Some of the Shannon Fabrics' executives, representatives and band ambassadors

Thirty people from all over the country were chosen out of four hundred applicants to be brand ambassadors. We were all chosen for different reasons and expertise, but we all have a common thread of sewing.  It was a time of a lifetime to be able to affectionately bond with so many different people.

Not only did we wear the same scarf, we were sewing partners that had the common bond of being the mother to large families - 8 for Pamela O'Neil and 9 for me

Not only did we wear the same scarf, we were sewing partners that had the common bond of being the mother to large families - 8 for Pamela O'Neil and 9 for me

Our mission as brand ambassadors is to teach others how to sew with the lush Shannon Fabrics. We are the Shannon Fabrics educators. We were trained on how to present demonstrations, trunk shows, and classes. This brand ambassador program is a new concept for them and we are proudly the first class to graduate. 

Our wonderful main educator and coordinator, Teresa Coates

Our wonderful main educator and coordinator, Teresa Coates

We spent three days in an intensive training. From six in the morning until eleven at night it was non-stop training (okay eating too), but it was truly a time of a lifetime.  I had so much fun, learned so much, and fell in love with the company’s culture. They are passionately family and quality oriented.

Even the executive, Julie Olds, had a hand at instructing us

Even the executive, Julie Olds, had a hand at instructing us

The actual fabrics of Shannon Fabrics are what initially sold me on applying to become a brand ambassador.  Their number one product is a line called Cuddle.

Cuddle comes in a wide range of 96 colors

Cuddle comes in a wide range of 96 colors

This is just one example of the lovely quilts that can be made from Cuddle

This is just one example of the lovely quilts that can be made from Cuddle

In my opinion, it is the softest fabric there is. It is in the broad category of textiles named minky, but this is far superior to the generic minky fabric that you would feel at the local chain fabric store. It has a thicker pile and is so much more luxurious. There are also many other aspects as to why it sews so much better, but that is for another blog post (of course).

The colors in the this quilt are just exquiste

The colors in the this quilt are just exquiste

This is one of my favorite colors and workmanship as I am amazed at the detail in this printing

This is one of my favorite colors and workmanship as I am amazed at the detail in this printing

Over the past few months in preparing for this venture, I have come to realize that Shannon Fabrics has so many more sumptuous fabrics beyond the simple Cuddle line. I am absolutely in love with their faux fur and to be perfectly honest, I do not know why people wear real animal furs when they can have these Tissavel furs that are so soft you get lost in them. Those Luxe Cuddle throws had a hard time being passed around as everyone wanted a chance to cuddle up with them and did not want to give them up.

The sweet Donna Thornton swaddled in a lucious Luxe Cuddle

The sweet Donna Thornton swaddled in a lucious Luxe Cuddle

During our three days, we were treated like royalty. Of course, we were all given our own set of fur throws, but Shannon Fabrics was also extremely generous with each one of us being provided an entire large suitcase full of fabrics and notions.

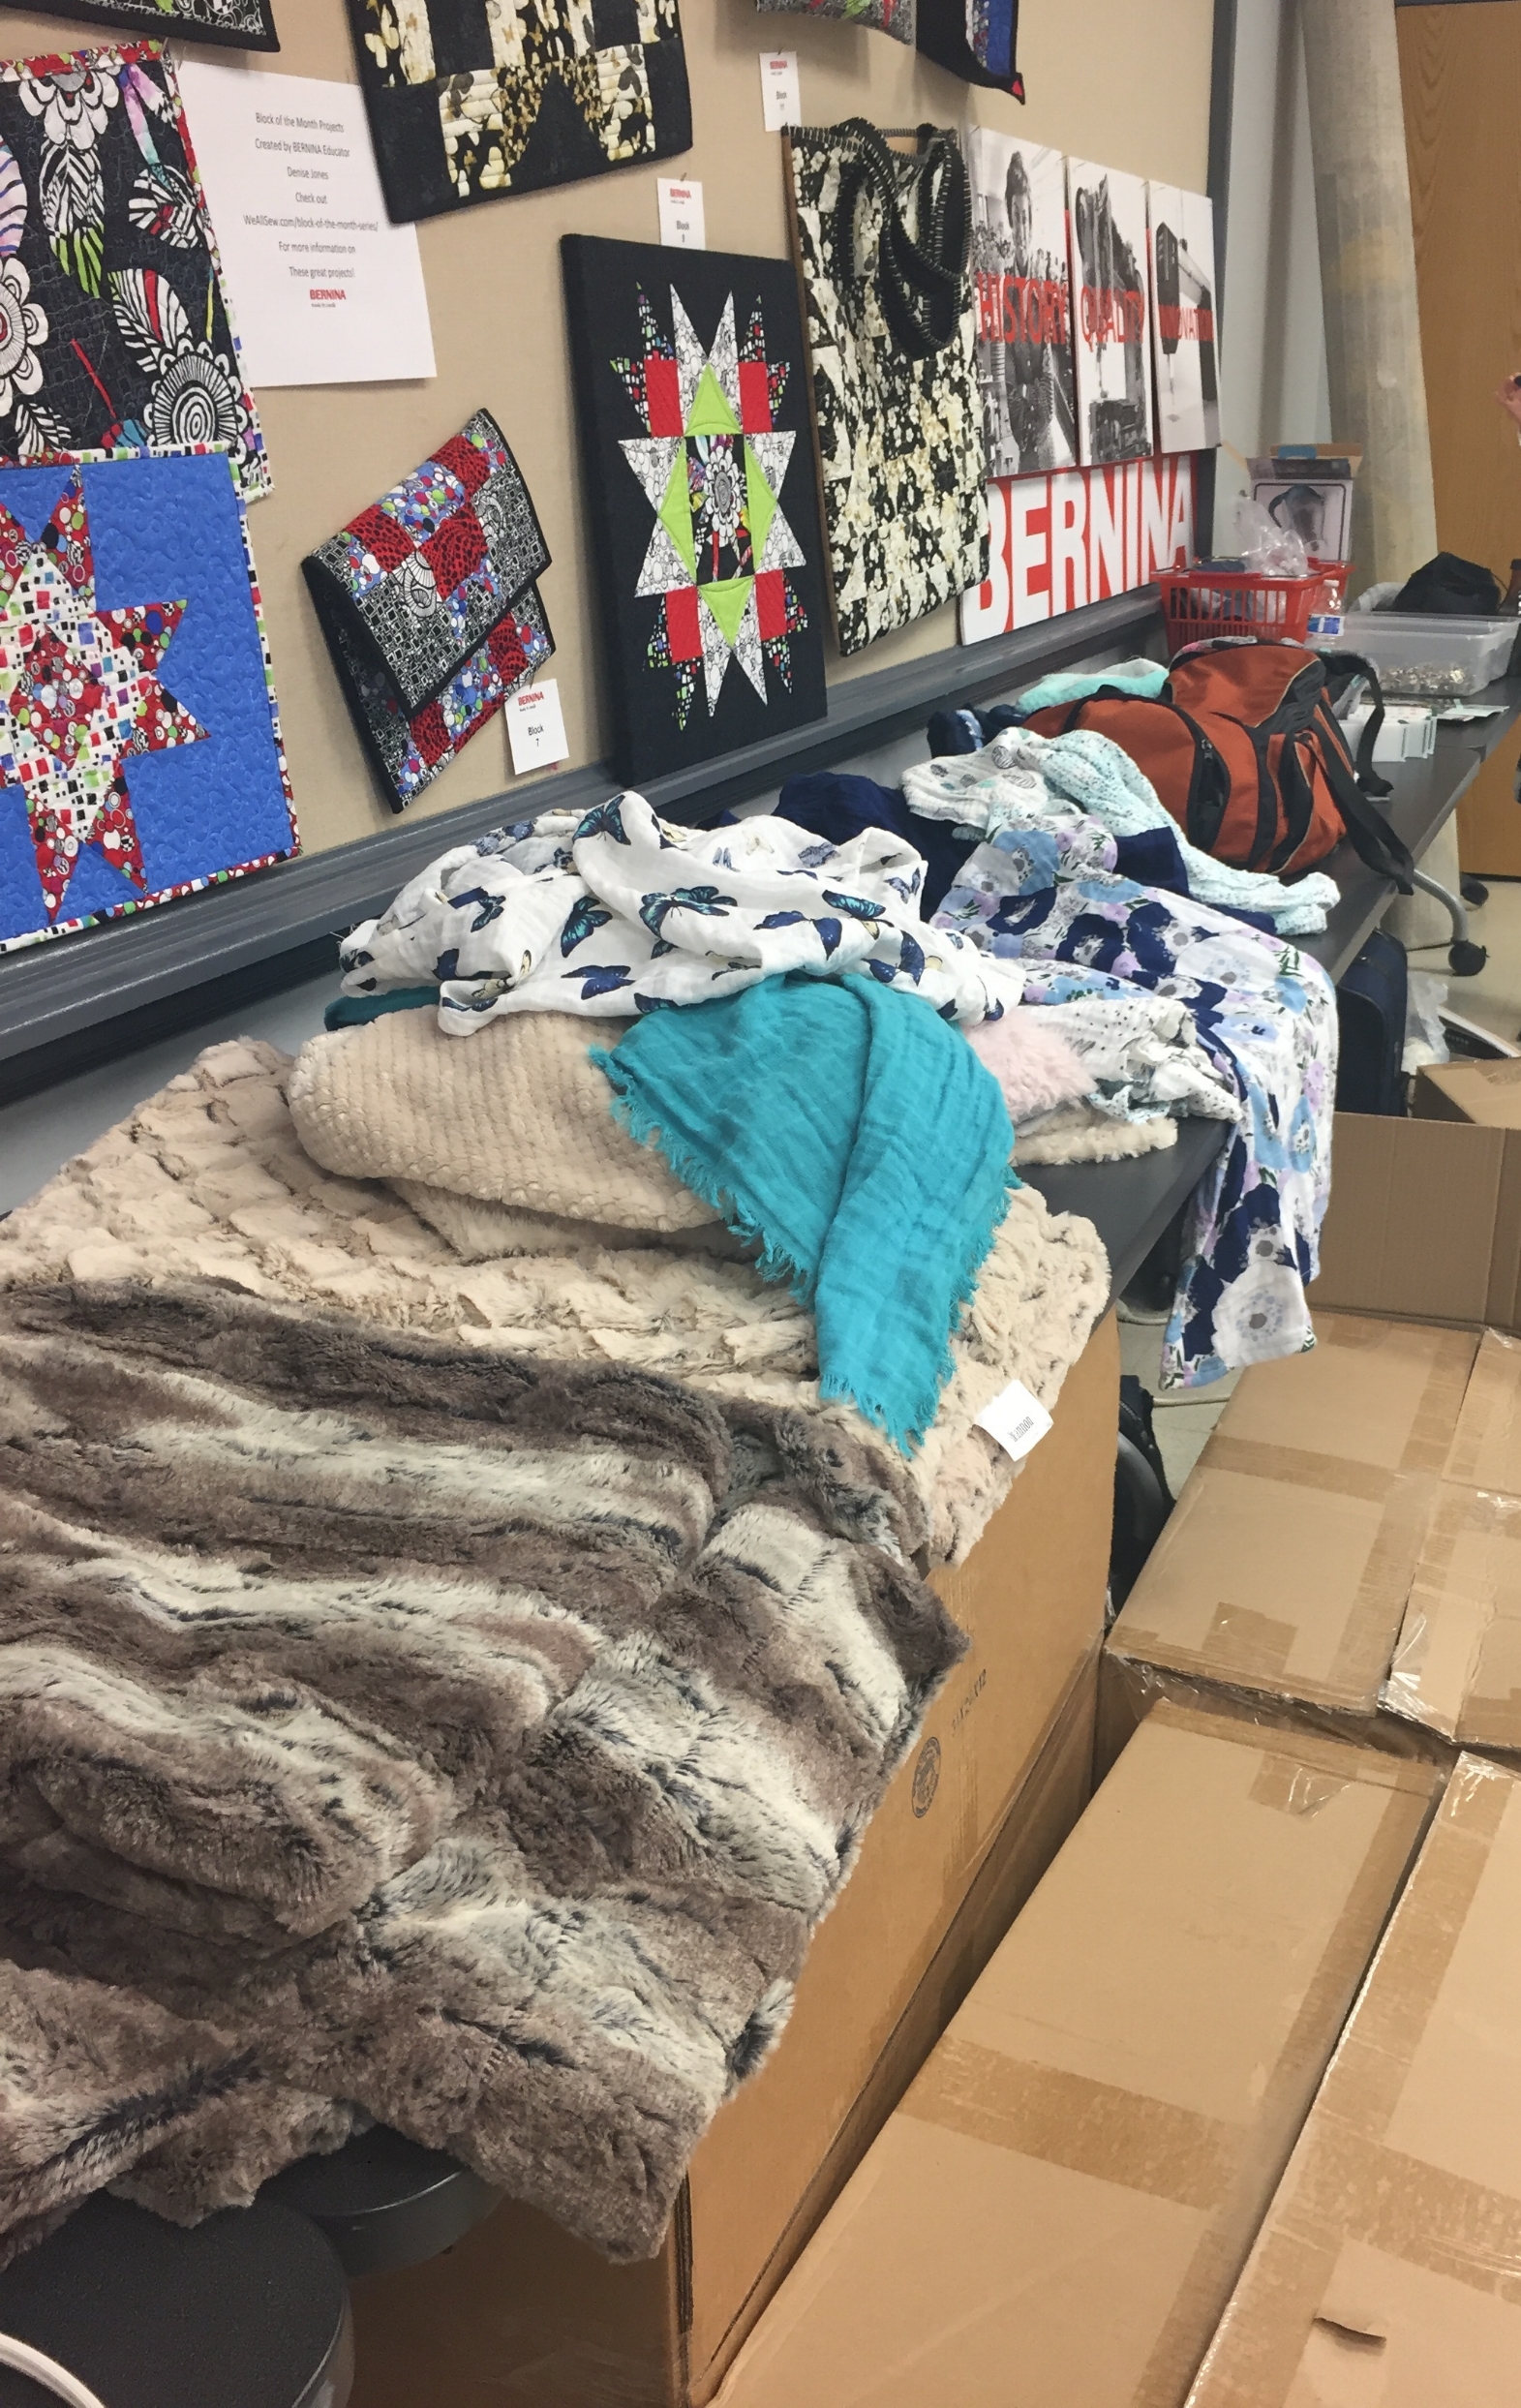
All those boxes are filled with fabric for each of us and an abundance of samples are on the table

All those boxes are filled with fabric for each of us and an abundance of samples are on the table

They had arranged with their sponsors to indulge us with so many notions. There were so many that they filled an entire bag. We were all so overwhelmed with the generosity of Shannon Fabrics and their sponsors.

A bag filled with sewing notions to begin, but it would be overflowing by the end

A bag filled with sewing notions to begin, but it would be overflowing by the end

As you would expect, we ate like the rich and famous with all their furs. The first night we had a wonderful sampling of those Chicago deep-dish pizzas and the next night we were privileged to be at the Aspen Lane Wine Company that follows the Newman model of donating all their profits. You can read about their giving hearts if you click here.

Dinner at the Aspen Lane Wine Company

Dinner at the Aspen Lane Wine Company

Shannon Fabrics also has many other lines of fabrics such as their Embrace, which is a contemporary and popular double gauze.  Have you noticed how many names are loving names? Let me tell you we had fun with those as each morning we cuddled. Yes, we gave hugs and kisses to everyone – people we had never known before this event. There were a few people that were stretched out of their comfort zones and I think the Bernina educator was the saddest to see us leave.

This is a sweet blanket made with Embrace on the top and a gorgeous Luxe Cuddle on the bottom

This is a sweet blanket made with Embrace on the top and a gorgeous Luxe Cuddle on the bottom

Some of the garments that can be created with Embrace

Some of the garments that can be created with Embrace

The Bernina Center was unbelievable.  There was a dedicated high-end Bernina sewing machine for all of us with a large workstation and the training was phenomenal.

The Bernina Center educational room

The Bernina Center educational room

Indubitably, Shannon Fabrics taught us well. We had thorough explanations as well as hands on construction, and evaluations. We saw garments as well as every other possible item that could be made with their fabrics. We even heard from a company that specialized in cosplay using Shannon Fabrics.  

The detail in this garment is impecable

The detail in this garment is impecable

It was a wonderful experience and one that I will treasure for a lifetime, but it was the people that made the difference. Without them, this would not have been the same. They were an incredible group of people and I hope that you have the pleasure to meet some of them. 

My lovely roommate, Susan Hastings, was so sweet that she wore machine embroidery every day

My lovely roommate, Susan Hastings, was so sweet that she wore machine embroidery every day

Beyond a doubt, I am so psyched. I just want to start sewing all that fabric in my suitcase.  Yes, there is so much that I am having a little trouble finding where to put it all. It is still in my suitcase. Do not tell my husband, but I have big plans for a new sewing studio.

Thank you, Shannon Fabrics for everything, but especially for “Making the world a softer place!” Words can never express my gratitude.

July is Sew-a-Softie Month

Softies are simple sewing projects that can be stuffed with poly-fil. They are anything from super easy to more complex creations. This Sew-a-Softie project started as an initiative to encourage young people and adults who have never sewn that sewing is easy and fun. It was started in Australia by Trixi Symonds who was recently featured in the magazine, Creative Machine Embroidery.

2016 was the debut of this international event and this year it has evolved into a month long affair. There is a dedicated website at www.sewasoftie.com and a Facebook group - Sew a Softie

You will want to follow "Sew a Softie" on your Facebook account as there will be a great giveaway, or follow the Sew a Softie blog for a chance at the giveaway. Click here is a list of all the items on the giveaway list .

If you have never sewn before or would like to teach someone else, this is a great place to start.  All month there will be free patterns and tips. Here are two excellent resources to learn how to hand sew:

Red Ted Art has great videos explaining the basic stitches

Red Ted Art has great videos explaining the basic stitches

There is a roundup of crafty people coming together to share their talents for this project. Below is a list of the first 15 days of the roundup. Please click on their website on their day to see what they have designed just for you.

July 1 – Trixi Symonds at Coloured Buttons

July 2 – Tina at Miss Daisy Patterns  

July 3 - Mignon Prider Design 

July 4 – Maggy at Red Ted Art

July 5 – Abbie at While She Naps

July 6 –Mollie at Wild Olive 

You will not want to miss Mollie's adorable alpaca today.  Llama's and alpacas are the rave lately. 

July 7 - Elisa Allen at Make Film Play

July 8 – Laura at Colourful Minds

July 9 – Zoe at Love Patchwork & Quilting

July 10 –Amie at Sewing School Book

July 10- Nic Hahn at Mini Matisse

July 11 - Damjanaat AppleGreen Cottage

July 12 – MaryAnne at Mama Smiles

July 13 – Amalia at Handmade by Amalia

July 14 – Joanna at The Blue Barn

July 15 Penny at Mother Natured 

Have fun sewing and if you can, teach someone else to sew too. 

Domed Dish Cover with Thermal Protection

Summer time is such a wonderful time to entertain.  It starts off with Memorial Day and Labor Day with July 4th tucked in the middle.  Of course, those winter months are pretty awesome for entertaining. They start with Thanksgiving and end with New Years with that big Christmas Day in between. Wow! We do love our holidays.

Thank you to Fairfield Processing for graciously donating the Aluminor Fabric used in this project and sponsoring this blog post. While they provided the impetus, all the opinions, comments and designs are mine.  They did not influence me.

This project is great no matter when you entertain, or if you are just serving everyday food for your family.  It is sure to bring a little festivity to the table. This project is perfect for keeping food warm or cold.  It uses this glitzy fabric from Fairfield called “Aluminor.”

It can cover a 12” round dish that is heaped full of food or even a bowl. I plan on using it for those high domed pies this summer. Here are two blueberry recipes from our favorite cookbook “Spices of the World Cookbook” by McCormick.

Spices of the World Cookbook by McCormick

Spices of the World Cookbook by McCormick

Blueberry Cobbler and Blueberry Crumble Recipes from Spices of the World Cookbook by McCormick

Blueberry Cobbler and Blueberry Crumble Recipes from Spices of the World Cookbook by McCormick

While this project is domed and looks difficult to make, it actually was amazingly easy.  I designed it, sewed it, took pictures of it, and wrote the instructions all in one afternoon.  But I must confess that it would not have been that easy if I had not found an awesome website on the Internet.  It calculated the exact dimensions of the gores and how many gores.  All I had to do was put in the diameter that I wanted and push the enter button.  I have been going around for the past few days feeling like a mathematical genius, when all I really did was find a great website with Google. If you want to make yours a different size just use this awesome site to calculate the size of your gores and add ½” seam allowance and I promise you, you will feel like an Einstein. http://www.domerama.com/calculators/cover-pattern/ But don’t feel intimidated.  I copied my gore, so is all you have to do is download it and cut it out. 

You might want to note that there are seven gores – an odd number, so when I made my alternating silver and gold Aluminor I had 2 colors next to each other.  To offset this I decided to highlight it by putting a label on it.  This will eliminate everyone lifting the lid to see what is underneath since they cannot see through it.  So it accomplished more than I anticipated. Of course, this label is optional and you are welcome to make yours all one color.

For this project, I decided not to use machine embroidery since it is not lined and the Aluminor is on the outside.  I did not want it to lose any of it thermal properties through the needle holes. It is not lined, but there is no worry if it touches food because of it also being food-safe.

My family is starting to think that Fairfield paid me to test these fabrics, but they did not. I just decided to conduct my own unscientific experiment to see how well Aluminor really worked. Here is how I conducted this experiment:

·      3:22 PM - At the same time, I placed 10 ice cubes in a glass container and put them on the table with another 10 ice cubes in the same style glass container, but this one I put under the domed Aluminor dish cover.
·      4:29 PM - After 37 minutes the ice cubes without the cover were already melting and the ice cubes under the cover were starting to melt.
·      5:16 PM – It has been almost two hours since I started the experiment and the ice cubes without the cover are completely melted. The ice cubes under the cover are more than halfway melted.

Conclusion: The Aluminor definitely showed that it was able to keep the ice cubes cold longer when it was used.

DISCLAIMER: While this test showed that the ice cubes stayed frozen longer with Aluminor, it does not mean that all foods would be safe for extended periods of time, so please always be food-safe and follow the USDA Basics for Handling Food Safely.

INSTRUCTIONS

TEMPLATE:

Click here to download circle template

MATERIALS:

12”  piece of gold Aluminor

12” piece of silver Aluminor

Neutral color of good quality thread

Large shank button

Medium sized 2-hole button (strength underneath the shank button)

Coordinating upholstery thread (for the buttons since it is used as a handle)

OPTIONAL: Self-adhesive chalkboard label

SUPPLIES:

Sewing machine and related supplies

Rotary cutter and mat are helpful, but not necessary

Shears & Trimming Scissors

Ruler

Wonder Clips® are preferred, but pins are acceptable

Point turner or some other blunt, but pointed object

Pen or pencil


STEP ONE

NOTE:

This project uses ½” seam allowances.

Do not press this fabric.  Finger pressing is sufficient.  Please see Fairfield’s website for tips on using this fabric. (Please note that there is no longer a sale on the fabric.)

Please read the instructions below before beginning. Gather the materials and supplies. Pre-wash the main fabric, press, and starch. Do not wash the Aluminor.

STEP TWO

Download the template and cut it out.

STEP THREE

Cut the fabrics as follows:

·      Using the template cut four (4) pieces of gold Aluminor

·      Using the template cut three (3) pieces of silver Aluminor

STEP FOUR

With a pen or pencil mark a ½” line at the top of each gore where it comes to a point.

STEP FIVE

With right sides together, sew one gold gore to one silver gore. Start sewing at the bottom of the gore and stop sewing about 2 stitches after the ½” mark at the top of the gore.

Stop sewing about 2 stitches after the ½” mark at the top of the gore

Stop sewing about 2 stitches after the ½” mark at the top of the gore

STEP SIX

Continue sewing the gores together, alternating between silver and gold, until all the gores are connected.

STEP SEVEN

Finger press the seams open. With the wrong side up, zig zag each each seam along the stitched seam. This will keep the seams open.

STEP EIGHT

Place the first and the last gore right sides together and sew in the same manner as above. Zig zag as before.

STEP NINE

Fold the bottom of the dish cover up ½” and edge stitch.

STEP TEN

Sew the button on by hand using upholstery thread so it is stronger since it will be used as a handle. Reinforce the button by simultaneously sewing a 2-holed button on the inside.

STEP ELEVEN

Follow the manufacturer's guidelines and place the chalkboard label in the center of the two gold gores.

Please do not put Aluminor in the washing machine. Please wash by hand and do not crinkle, keep flat while washing and storing.

(Have fun wearing your new hat. LOL! This will definitely need a Clorox wipe as all my children keep wearing it.)

Enjoy your holidays and travel safe!


Dish Cover with Thermal Protection

It is so much fun to entertain during the summer.  Maybe because you can be outside and barbeque. One of my favorite summer dishes is “Deviled Eggs.”  I have this scrumptious recipe for which everyone asks. It is so good that I serve them all year round.

Thank you to Fairfield Processing for graciously donating the Solarize Liner Fabric and Stiffen 2 used in this project and sponsoring this blog post. While they provided the impetus, all the opinions, comments and designs are mine.  They did not influence me.

Deviled Eggs are the type of food that you can prepare the day before, so when it comes time to set the table, I like to put them out early and inevitably there is one or two that do not get eaten, so they wind up sitting on the table for longer than they probably should.  This project is just the solution to solve that problem.

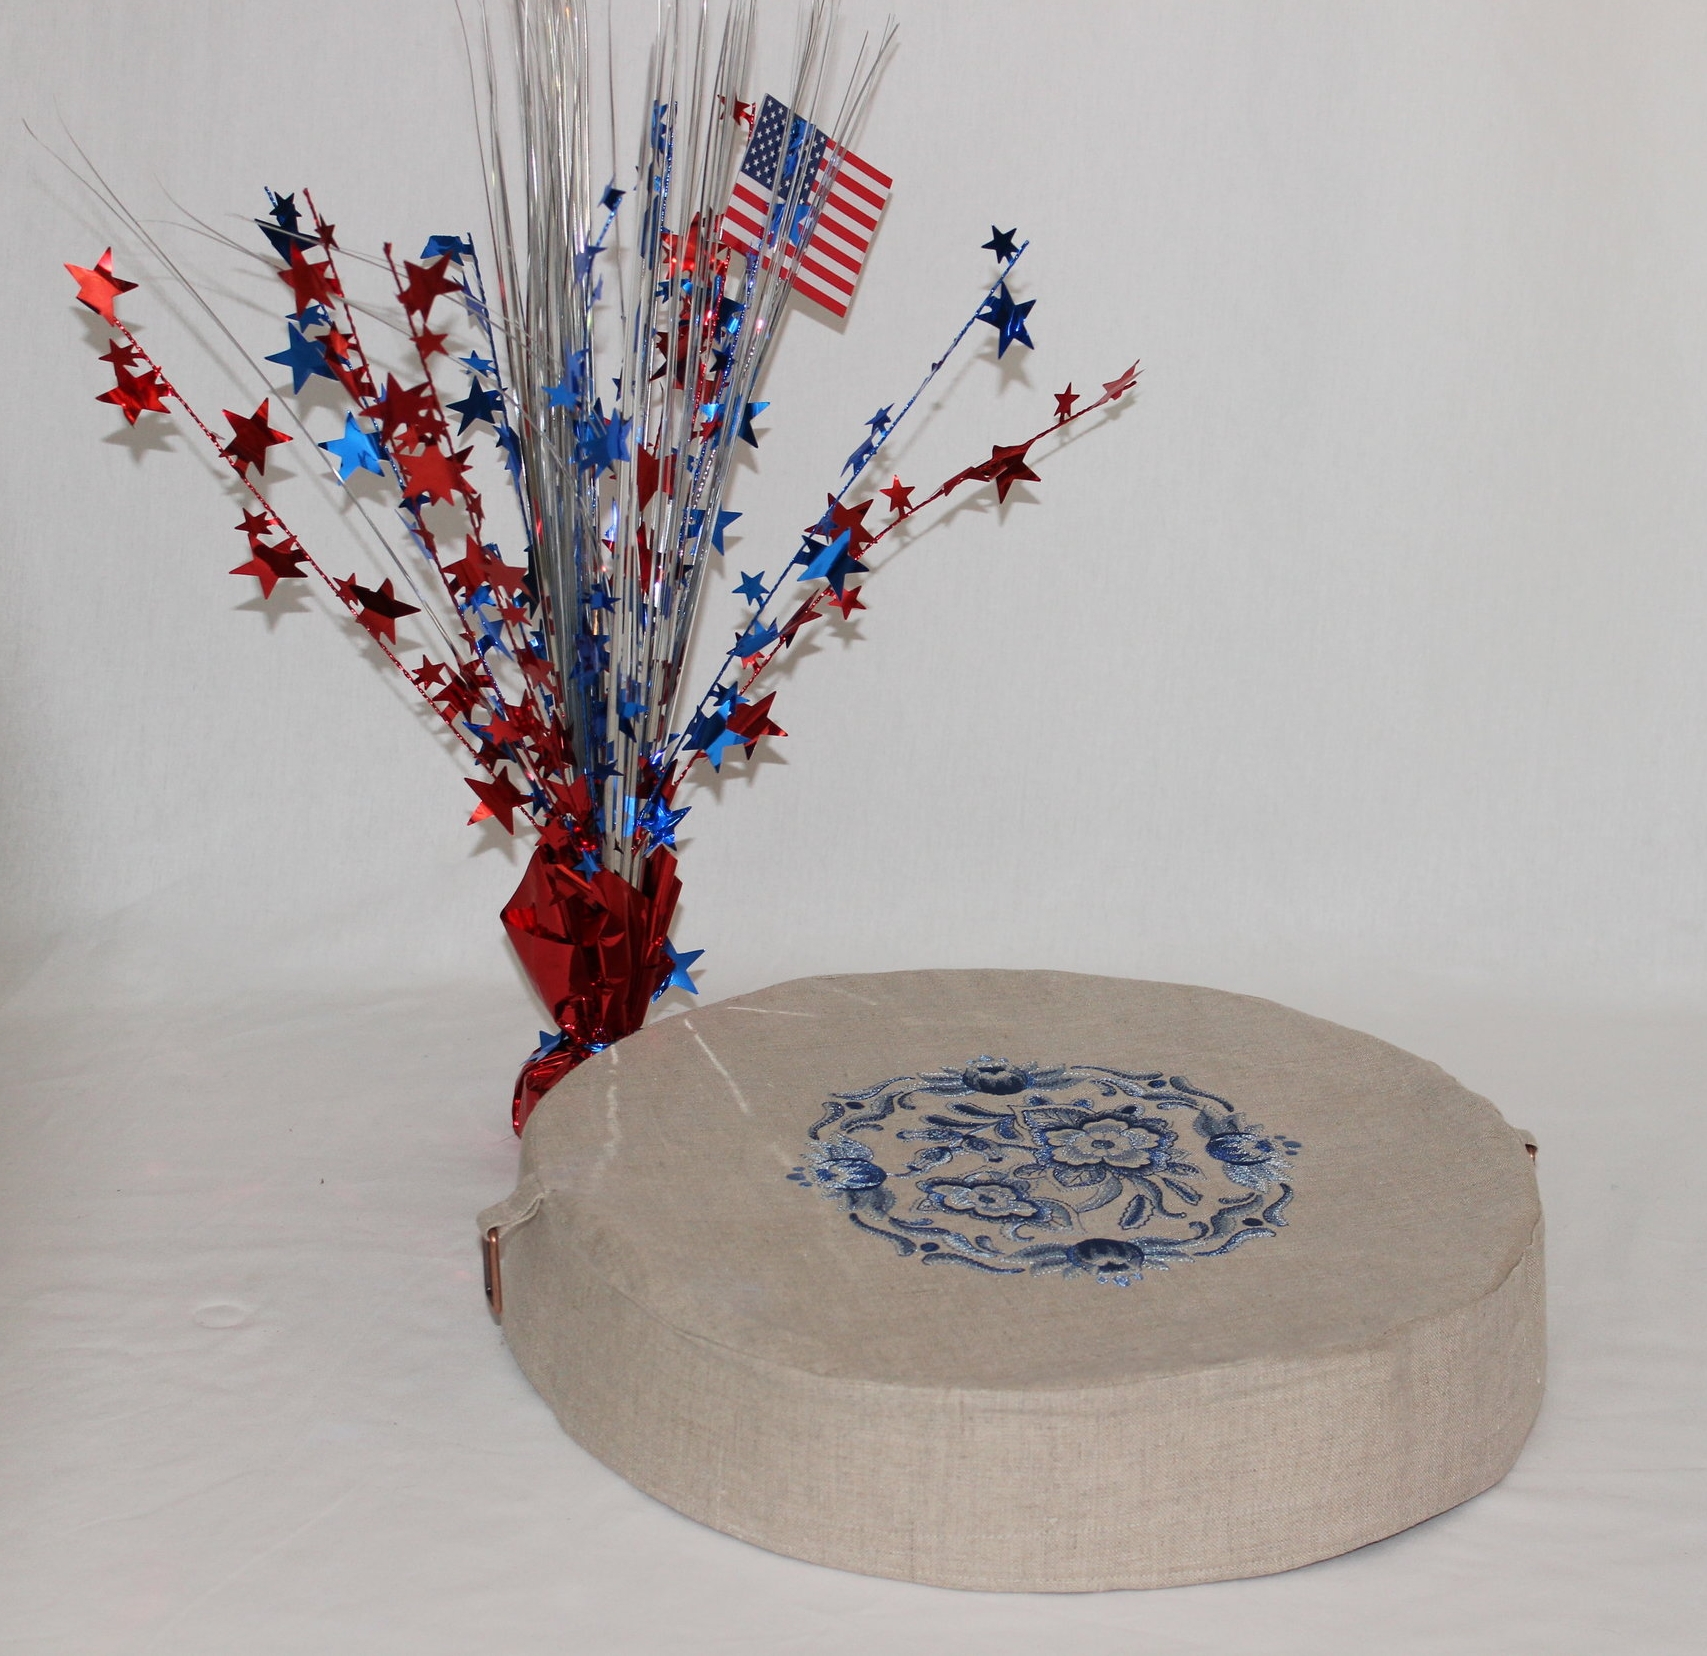
Machine Embroidery Design by Embroidery Library: Delft Blue Floral Medallion I (F8541)

Machine Embroidery Design by Embroidery LibraryDelft Blue Floral Medallion I (F8541)

My deviled egg dish is quite large – 14” diameter, so it is not easy to cover and if I use aluminum foil or plastic wrap, it has a tendency to flatten my nicely piped centers, so I thought a self-standing dish cover was just the trick. The best part is that this project uses Solarize Liner Fabric from Fairfield Processing.  Not only do I now have a dish cover that will not touch my deviled eggs, but they will also be kept cool while they sit on the table.

While I created this dish cover for my deviled eggs, it is extremely versatile.  The Solarize Liner Fabric maintains both cold and hot temperatures and is food-safe.  When my children are home, I make 3-5 pounds of bacon each morning (there are 11 of us and their spouses) and this cover will be great to keep that platter warm while I am serving up the other dishes.

Here is the deviled egg recipe from our family’s absolute favorite cookbook, Spices of the World Cookbook by McCormick. I have not found a recipe in that book that I did not love.

Spices of the World Cookbook by McCormick

Spices of the World Cookbook by McCormick

Deviled Egg Recipe from Spices of the World Cookbook by McCormick

Deviled Egg Recipe from Spices of the World Cookbook by McCormick

Here is my own unscientific experiment to see how well Solarize Liner Fabric actually works. This is how I conducted the experiment:

·      11:123 AM - At the same time, I placed 10 ice cubes in a glass container and put them on the table with another 10 ice cubes in the same style glass container, but this one I put under the Solarize Liner Fabric dish cover.
·      11:53 AM - After 30 minutes the ice cubes without the cover were already starting to melt and the ice cubes under the cover were still whole. (I took off the cover just for the picture.)
·      1:29 AM – It has been two hours and 6 minutes since I started the experiment, and the ice cubes without the cover are completely melted. The ice cubes under the cover are more than halfway melted.
IMG_2567.JPG

Conclusion: The Solarize Liner Fabric definitely showed that it was able to keep the ice cubes cold longer when it was used.

DISCLAIMER: While this test showed that the ice cubes stayed frozen longer using Solarize Liner Fabric, it does not mean that all foods would be safe for extended periods of time, so please always be food-safe and follow the USDA Basics for Handling Food Safely.

INSTRUCTIONS

TEMPLATE:

Click here to download circle template

MATERIALS:

15”  piece of Solarize Liner Fabric

14”  piece of Stiffen 2 by Fairfield (a double-sided fusible, rigid material that is similar to cardboard)

½ to 1  yard of main fabric (I used 100% linen. Amount varies depending on if you want to piece your bias strip or have one continuous piece.)

Coordinating good quality thread

OPTIONAL: 2 Dritz 1” Rectangle Rings in Copper

SUPPLIES:

Sewing machine and related supplies

Rotary cutter and mat are helpful, but not necessary

Shears & Trimming Scissors

Ruler

Wonder Clips® are preferred, but pins are acceptable

Point turner or some other blunt, but pointed object

Iron & ironing board

Pressing cloth

Teflon or Applique Pressing Sheet

Painter’s tape

OPTIONAL: Tailor’s ham


STEP ONE

NOTE:

This project uses ½” seam allowances.

Use a pressing cloth and test all fabrics before pressing.

Please read the instructions below before beginning. Gather the materials and supplies. Pre-wash the main fabric, press, and starch. Do not wash the Solarize Liner Fabric. Also, please read the manufacturer's guidelines on how to use their products.

STEP TWO

Download the template. Print it twice. Cut one for a 15” circle.  For the second circle, fold ½” under on both the straight edges. Now cut. This will be a 14” circle template.

STEP THREE

Cut the fabrics as follows:

·      Using the template, cut one 15” circle from the main fabric (this is the top)

·      Using the template, cut one 15” circle from the Solarize Liner Fabric (this is the lining)

·      Using the second template, cut one 14” circle from the Stiffen 2 (this is the center support)

·      Cut 1 band from the main fabric measuring 4” by 47”

·      Cut 1 band from the Solarize Liner Fabric measuring 4” by 47”

·      Cut 1 band from the Stiffen 2 measuring 3” by 46”

      OR to be cost effective ... use 1 strip measuring 3" by 20" and 2 strips measuring 3" by 13"

·      Cut a strip of the main fabric on the bias measuring 48” (or join several pieces to form this length)

·      Cut 2 pieces of the main fabric to measure 2” by 7”

STEP FOUR

If you are hand or machine embroidering the main fabric of this cover, please do it now; otherwise, any other type of embellishment can be done at the end. I used a machine embroidery design by Embroidery LibraryDelft Blue Floral Medallion I (F8541)

STEP FIVE

Adhere both pieces of the Stiffen 2 to both pieces of the Solarize Liner Fabric in the following manner. Place a Teflon mat on a flat ironing surface. Place the Stiffen 2 on the mat (either side, as both sides are fusible). Now place the Solarize Liner Fabric right side up on top of the Stiffen 2, making sure that it is centered. NOTE: the two pieces stick nicely together, so you can align them facing up and then turn them upside down to verify correct placement.

Place a pressing cloth on top of the Solarize Liner Fabric press to adhere the two fabrics together, following the manufacturer’s guidelines. Do this for the circle and the band. Set both pieces aside.

Please note that if you are using the three strips instead of one continuous piece of Stiffen 2 for the band that you should center the larger in the middle and put the two on each side.  Also, I zig zagged mine twice on the seams to stiffen the seams.

STEP SIX

With right sides together, sew the seam of the band of the main fabric.  It will now form a circle. Press seam open. Do this for the lining as well. Finger press the lining.

STEP SEVEN

To create the two handles, use the two short pieces of the main fabric (2” by 7”) and with right sides together sew each long side, then turn right side out and press.

STEP EIGHT

Fold each strip in half and slip the copper rectangle into the center. Pin each handle on each side of the circle with the raw edges matching raw edges and on the right side of the circle. Tape the handles in place with painters tape to keep them from getting sewn into a seam.

STEP NINE

With right sides together pin the band and the main fabric circle together along the edge.

STEP TEN

Stitch in place, easing for a smooth seam. Using a tailor’s ham, press the seam down towards the band.

STEP ELEVEN

With right sides together pin the Solarize Liner Fabric band and the Solarize Liner Fabric circle together along the edge.

(It looks like a birthday cake.)

(It looks like a birthday cake.)

STEP TWELVE

Stitch in place, easing for a smooth seam. Do not press seams

STEP THIRTEEN

Slip the main fabric over the Solarize Liner Fabric and pin in place.

Turn inside out. Press the main fabric to adhere it to the Stiffen 2, being careful to smooth out any wrinkles. Turn right side out.

STEP FOURTEEN

Fold the bias strip in half. With the raw edge of the bias strip against the raw of the bottom of the band, pin in place leaving three inches of each side. Sew in place, but do not sew the last three inches on each side.

STEP FIFTEEN

Fold the edge of one bias end a ½”. Place the other end of the bias inside this fold piece. Cut it on an angle if necessary. 

Now stitch in place

STEP SIXTEEN

Fold the bias completely to the inside. Press.

Edge stitch and topstitch on each edge. Press.

Please do not put Solarize Fabric Liner or Stiffen 2, in the washing machine, please wash by hand and do not crinkle, keep flat while washing and storing.

IMG_2561.JPG

Enjoy your summer holidays and travel safe!


Cold Trivet for Entertaining

July 4th weekend is here! Are you entertaining? Maybe it is a BBQ with friends and family. Inevitably you will be serving something cold. In just an hour, you can make this easy trivet to keep things cool while your BBQ is heating up.

Thank you to Fairfield Processing for graciously donating the Solarize Liner Fabric and sponsoring this blog post. While they provided the impetus, all the opinions, comments and designs are mine.  They did not influence me.  

Solarize Liner Fabric was totally new to me, but I am in love with this product. It is fantastic for entertaining.  I plan on making several of this project for when I entertain over the winter holidays. 

The unique part of this project is that the cold trivet has five tunnels and the tunnels are filled with frozen freezer pops – the long plastic kind that children love to eat. The Solarize Liner Fabric is under the freezer pops so the properties of the fabric allow the cold to rise. I used thin linen so the coldness would radiate through the fabric on the top.

IMG_2488.JPG

My family thought I was a little crazy, but I conducted my own unscientific experiment to see how well Solarize Liner Fabric really worked. Here is how I conducted the experiment:

·      11:15 AM - At the same time, I placed 10 ice cubes in a glass container and put them on the table with another 10 ice cubes in the same style glass container, but this one I put on top of the cold trivet that was lined with Solarize Liner Fabric and filled with five freezer pops. I also placed a freezer pop in the center because I wanted to see when it melted compared to the ones inside the cold trivet. 

·      11:30 AM - After 15 minutes the ice cubes without the trivet were already starting to melt and the ice cubes on the trivet were still whole.  The freezer pop is still whole.

·      1:01 PM – It has been an hour and 46 minutes since I started the experiment and the ice cubes without the trivet are almost completely melted.  The freezer pop in the middle is completely melted compared to the freezer pop on the right which I pulled out of the trivet. The ice cubes on the cold trivet are halfway melted and the freezer pops inside are starting to melt a little. 

This experiment proved that this simple cold trivet lined with Solarize Liner Fabric and filled with five freezer pops, could keep food longer for at least two hours. I will definitely be using this for all my entertaining whether indoor or outdoor.

DISCLAIMER: While this test showed that the ice cubes stayed frozen longer, it does not mean that all foods would be safe for extended periods of time. For example, if it is a large bowl of potato salad, the salad on the top may not be cold enough, so please always be food-safe and follow the USDA Basics for Handling Food Safely.

The good part is that the trivet can be used for anything cold.  Originally, I had a bowl of potato salad in mind, but then I realized it was great for cold drinks, salad dressings, condiments, and dips – anything that you would want to keep cold while you are entertaining.  Also, it can be used for hot items as a trivet.  Keep it handy in a drawer by your stovetop and when you need to pull that pan off, grab it to put in under the pan. It will keep the pan warm. Double duty!

INSTRUCTIONS

MATERIALS:

12”  piece of Solarize Liner Fabric

1/3 yard of fabric (I used linen)

Frixion Earsable Pen by Pilot (or some other temporary marking pen)

5 freezer pops

Coordinating good quality thread

SUPPLIES:

Sewing machine and related supplies

Rotary cutter and mat are helpful, but not necessary

Shears & Trimming Scissors

Ruler

Wonder Clips® are preferred, but pins are acceptable

Point turner or some other blunt, but pointed object 

STEP ONE

NOTE:

  1. This project uses ½” seam allowances.
  2. Use a pressing cloth and test all fabrics before pressing.

Please read the instructions below before beginning. Gather the materials and supplies. Pre-wash the main fabric and press. Do not wash the Solarize Liner Fabric. 

STEP TWO

Cut the fabrics as follows:

·      Cut one piece of Solarize Liner Fabric to measure 12.25” by 11”

·      Cut one piece of the main fabric to measure 12.25” by 11” (this is the bottom)

·      Cut one piece of the main fabric to measure 12.25” by 13.5” (this is the top)

STEP THREE

Place the top fabric (12.25” by 13.5” ) face up on a flat surface with 12.5” on the sides and the 13.5” is on the top and bottom. Draw the following lines with the Frixion Earsable Pen: (see the picture below for a guideline)

·      a vertical line ½” from the right side

·      a vertical line 2” from the ½” line

·      a horizontal line ½” from the top that runs from the left side to the last vertical line

·      a horizontal line ½” from the bottom that runs from the left side to the last vertical line

·      space four horizontal lines 2.25” from the last horizontal line that runs from the left side to the last vertical line (these are the tunnels for the freezer pops)

IMG_2442.JPG

If you are hand or machine embroidering this trivet, please do it now; otherwise, any other type of embellishment can be done at the end. Please note that the horizontal lines are where it will be sewn and this could affect the embroidery.

Machine embroidery Design: Delft Blue Floral Medallion I (F8541) by Embroidery LibraryBuilt-in Font on the Baby Lock Ellisimo Gold

Machine embroidery Design: Delft Blue Floral Medallion I (F8541) by Embroidery Library

Built-in Font on the Baby Lock Ellisimo Gold

Place this fabric aside and do not iron until the project is complete or you will lose the markings.

STEP FOUR

Find the long side of the back piece of the main fabric (12.25”). With right sides together, sew the Solarize Liner Fabric to the back piece of the main fabric at one of the long sides. Turn right side out. Press. Topstitch.

STEP FIVE

Baste the other 3 sides of the back piece and Solarize Liner Fabric.

Solarize Liner fabric topstitched at the top and basted on the 3 sides with linen on the other side

Solarize Liner fabric topstitched at the top and basted on the 3 sides with linen on the other side

STEP SIX

Fold the front fabric along the ½” mark that runs vertically on the right. Now fold it under ¼” towards the wrong side. This will be a ¼” hem on the opening. Stitch along the edge.

STEP SEVEN

Fold the flap back along the 2” horizontal line. It will be right side against right side. Pin the flap in place. 

Machine embroidery Design: Delft Blue Floral Border (D7039)) by Embroidery LibraryBuilt-in Font on the Baby Lock Ellisimo Gold

Machine embroidery Design: Delft Blue Floral Border (D7039)) by Embroidery Library

Built-in Font on the Baby Lock Ellisimo Gold

STEP EIGHT

With right sides together and using Wonder Clips®, clip the front piece to the back piece. The flap will be on the inside facing the right side of the back.

IMG_2472.JPG


STEP NINE

Sew the three sides with a straight stitch. Do not sew the flap. Clip the 2 inside corners only. Then finish the edges with a zig zag stitch.


STEP TEN

Turn right side out and push the corners out with a pointer. Do not press with an iron (or you will lose the markings). Finger press. Make sure the flap is still on the same side as the front.

Machine embroidery Design: Delft Blue Floral Border (D7039) by Embroidery LibraryBuilt-in Font on the Baby Lock Ellisimo Gold

Machine embroidery Design: Delft Blue Floral Border (D7039) by Embroidery Library

Built-in Font on the Baby Lock Ellisimo Gold

STEP ELEVEN

Starting at the bottom of the trivet sew along the horizontal lines with a straight stitch.  When you reach the end of the drawn line stop and backstitch three times. Sew all four lines.

STEP TWELVE

Press to remove the markings. Insert freezer pops and flip the flap to close the opening. A small Velcro dot could be added if this is needed. Add any decorative embellishments. 

Please do not put Solarize Fabric Liner in the washing machine, please wash by hand and do not crinkle, keep flat while washing and storing.

By the way, they do sell tubular ice sticks on Amazon if you are interested in those instead.  This is just a short version.

Here is a BBQ recipe from our favorite Dutch cookbook.

Enjoy your holidays and travel safe!

ANNOUNCEMENT - Now a Designer for Fairfield™ Processing Corporation

This blog post is sponsored by Fairfield™ Processing Corporation. Not because they asked me to write it or that I am getting paid by them, or even though I have received generous boxes of products from them, but because I am now on their Design Team; however, all the opinions are mine.  I assure you that they have had no influence on me.

So many exciting things have been happening around here. I am so happy to announce that I am now officially on the Design Team for Fairfield™ Processing Corporation.  You may have guessed something was up when I blogged about visiting Fairfield in May.

When I first started this blog, I had deliberated on whether I would accept any products or money from sponsors.  Originally, I was going just blog and not accept anything after reading several other bloggers who were purists and felt that sponsorship was not the way to go. To be perfectly honest, I loved Fairfield products way before I ever became a designer so it was an easy decision for me. 

They have so many products and I was amazed to see all of them when I visited. They are a company that is behind the scenes of crafters and sewers.  They make gorgeous batting for quilts, volumes of different pillow forms, interfacings, foam, and many different specialty products.  Basically - Fillers. Their logo is "at the heart of your project." That just captures it! Three products that I was not aware of before I joined, I have come to adore - Shield, Aluminor, and Solarize.  

Shield Liner Fabric is the coolest fabric ever.  I know that if this had been around when my children were young, I would have purchased a bolt of it. Well, with nine children, I am sure it would have been more than one. You can plan on me using this in my designs even though I do not have young children. It is for adults too and besides, I am starting a grandma's hope chest, but do not tell my children. You could just use this product straight with no other fabrics and it would be fabulous for protection.

Fairfield's Shield Fabric Liner

Fairfield's Shield Fabric Liner

The awesome part is that it truly was designed for use everywhere as it is food safe and microwavable. Let Fairfield tell you in their words exactly what it is...

Shield, a moisture & allergen barrier fabric, is a PUL fabric that creates moisture and allergen barrier for improved health and comfort. Sew a layer to the top or inside of your project to create a shield against moisture, grease, pollens, dustmites and dander.

Aluminor is the one that caught my eye. It is a gold or silver quilted thermal fabric that can keep things cold or warm, basically maintaining temperature. This has so many potentials in the kitchen and on the body. The most obvious project would be a fashionable tote to carry food.  Of course, Fairfield  already thought of that.  Here is a link to their project: https://www.fairfieldworld.com/project/aluminor-tote-bag/

Fairfield Project using Aluminor for a Tote Bag

Fairfield Project using Aluminor for a Tote Bag

The next product is very similar but yet very different, It is Solarize. It is used like an interfacing and has the same thermal principles as Aluminor, but is used on the inside. Of course, this product is perfect around food and it is food safe. This product would also be wonderful as a liner in children's boots, and clothing in the winter harsh cold months when they go out to play. Put it in a pair of mittens with a liner of Shield and those children will be making snowmen and snowballs all afternoon. 

Fairfield has a resource center of projects using their products. They have recently started a back-to-school theme of which I have had the privilege to contribute three projects.  You will see those on the blog soon. I am in love with their new indigo dying technique for home decor. All the projects are just gorgeous and their dying technique is so clever. Personally, my favorite is the alpaca tuffet. I had the opportunity to see it in person and I know first hand that the pictures do not do it justice. It is the cutest thing ever.  

Fairfield Project for a Alpaca Tuffet

Fairfield Project for a Alpaca Tuffet

Their website has so many projects to keep you going for a long time. It is link that you will want to bookmark for a resource for projects. By the way, the website is not just for sewers.  There are many projects that do not require sewing.

Many of my readers are beginning sewers, so I know you will be able to use many of the upcoming projects that I have planned. The best part for me is that I have the freedom to even use machine embroidery on the projects I design. So if you have a project in mind that you would love to see come to fruition, send me an email. I would love to hear your ideas.

Happy sewing!


How to Sew a Pillowcase Dress

The best sewing projects are when they are done together with a friend. A friend of mine texted me, and asked if I would help her reestablish her sewing skills by making pillowcase dresses for her daughters. Oh, I loved the idea – fellowship and sewing – it does not get any better than that.

Pillowcase dress on the sweetest girl with a matching purse and rosettes made by her mom.

Pillowcase dress on the sweetest girl with a matching purse and rosettes made by her mom.

Simplicity has a pattern designed just for pillowcase dresses. Pattern 2391 sounded like it was just perfect for her first project in several years.  We started out by perusing the pillowcases, the pattern, and finally finding dresses that were a good fit and length for the girls, so we could use them as a guide, since the girls were in school and we could not measure them.

After scanning the pattern and the instructions, I decided that view A and C were best, as they did not have the bottom band and I cut it out the front piece quickly. We measured the front piece with the girls’ dresses and then with the pillowcases to make sure that it all fit. The pattern uniquely has two instructions – one for fabric dresses – one for true pillowcase dresses. We opted for the dress made from a pillowcase.  My friend had purchased them so inexpensively and that was her goal with a pillowcase dress - inexpensive repurposed dress.

My big mistake, which turned out to be a good modification to the pattern, was that I did not see where it called for bias binding on the envelope.  It is usually in the “Notions” section, but it only said, “Thread. Look for Simplicity notions and Wrights trims.” That did not help as the pattern instructions clearly set out steps for using bias tape.  I did not know how wide or how much. That was fine with me, I love making my own bias, so I did not look any further on the pattern envelope and just proceeded to instruct my friend on making her own. So here are our instructions on how to make a pillowcase dress. (By the way, the pattern envelope does tell how much and how wide, but it is in the middle of the envelope after the fabric yardage for each view.)

How to Sew a Pillowcase Dress

(with bias made from the pillowcase)

STEP 1 - Gather supplies

Pillowcase (do not cut any seams)

Coordinating thread

2 3/8 yard of ribbon

Measurements or one garment such as a dress that can be used for measurements

A pattern or a garment that can be used for drafting an arm opening (aka armscye)

STEP 2 – Fold the pillowcase lengthwise. Layout the dress on the pillowcase to determine the placement, width and length of the dress. Mark or otherwise indicate the top of the dress. 

STEP 3 – Place the armscye )sleeve opening) pattern or dress on the seams of the pillowcase, lining up the top with that of the top line that you measured in Step 2.

STEP 4 – Cut the armscye and the top of the pillowcase straight to the edge of the fold.

Notice that we had extra width compared to the pattern, but that was good and could be taken in when gathered by the ribbon.

Notice that we had extra width compared to the pattern, but that was good and could be taken in when gathered by the ribbon.

STEP 5 – With the leftover pillowcase fabric cut four 2 inch strips that are the width of the pillowcase (not the diameter – you can cut the seams so there are two widths when you cut).  Two will be used for the bias binding on the sleeve openings (armscye). Two will be used for the casing on the neck for the ribbon.

STEP 6 – Press two bias strips in half lengthwise.

STEP 7 – Press the other two bias strips with a fold ¼” from the bottom.

STEP 8 – Pin the bias strip that has been pressed in half to the sleeve opening on the right side. 

2016-04-15 11.10.24.jpg

Cut any extra bias fabric at the end to match with the armscye. Do it for both armscyes.

STEP 9 – Sew the bias strip to each armscyce using a ½” seam allowance.

STEP 10 – Press the bias strip flat.

STEP 11 – Trim the seam allowance to 3/8”.

STEP 12 – Fold the bias strip down and sew it close to the edge. 

STEP 13 – Press the armscyes.

STEP 14 – To make the ribbon casing, pin the other bias strip with the ¼” fold to the neckline and fold the ends in about ½” from the end. Cut any extra bias fabric at the end to match with the neckline. Do it for the front and back.

STEP 15 – Press the bias strip flat – being careful not to loose the ¼” fold.

STEP 16 - Fold the bias strip down and sew it close to the edge of the ¼” fold.

STEP 17 – Press the neckline.

STEP 18 – Cut the ribbon in half and thread each through the casing made at the neckline. Do this for the front and the back, then tie the ribbons together at the shoulders to finish the dress.

My friend and I had a fun and productive morning together, but it was too short, so we decided that we needed to do it again soon. She would love to continue repurposing. What sewing projects have you sewn that are repurposed?


How to Prep Fabric for Neckline Embroidery

Machine embroidering a garment is so much fun.  You get the pleasure of both embroidering it and wearing it.  Many of us just embroider to enhance premade garments, but on those special garments, we even break down and create the whole garment. We do not get to do as much embroidering, but for some of us, garment construction is as much fun (well…almost).

Personally, I get extra enjoyment when I am embroidering for my family. My college daughter asked me to embroider her a Mexican flower peasant blouse, but after purchasing several patterns and fabrics, we settled on a tunic design.

She chose Simplicity 4149 with the cap sleeves from Simplicity 1461.  The fabric is a handkerchief weight cotton from Spechler-Vogel. Choosing the embroidery design was the easiest part.  I just loved Embroidery Online's Flores de Mexico. It looks and sounds so authentic. Their color combination that they chose to stitch out is just beautiful with a rich turquoise. My daughter chose a bright and neon combination from Floriani that just pops and screams, "Young."

It took me a little while before I had to courage to tackle this project as my daughter is a great machine embroider and I knew she would not be happy if the placement was not just right, but I also knew that if anyone would appreciate it, it would be her. 

The best strategy that I decided was to prep the fabric with all the necessary markings. When I purchased the fabric I did not have the foresight to buy extra since I knew it did not have a nap or a design. Next time I would definitely buy an extra half yard so I could put it in the hoop comfortably. Since I was right up to the edge on everything, I decided that I did not have any room for mistakes and would embroider with that mind set.

All the other pieces were cut out and I left the front of the pattern uncut. I traced the front pattern with a blue chalk onto the fabric. I knew that after multiple hoping that the chalk lines would not remain and I was not sure if they would be visible to the sewing machine's camera, so I decided to baste the chalk lines with a red cotton thread.

The seam allowance on the neckline was very important, as well as, the center front line and the placement for the front placket.  

In hindsight I needed the sleeve seam allowance also, so I wound up drawing them in when I was at that point.

For me the biggest decision was what stabilizer to use.  My daughter kept insisting that she wanted a wash away, but my I did not feel comfortable doing that with such a lightweight fabric combined with a heavy design.  That was not a good mix in the first place. I practiced with a wash away and was not happy with it. She loves the convenience of the tear away, but I went against all her wishes and used the "No Show Mesh Nylon Cutaway Fusible Stabilizer" by Floriani. Of course, I was a smart mom and did not tell her what I used until she said she loved it. 

The stabilizer was applied to cover the entire area that was going to be embroidered, including the area where it would need to be hooped, but the fabric would not be in the hoop. Here is where I would have loved to have had those extra inches of fabric, but since the fabric was so thin, it would hoop so evenly and tightly that it would not even make a difference.

My daughter loved the placement of the Embroidery Online tunic, so I tried to duplicate it as much as possible. After close examination, we determined that the main bottom center design was actually two designs stitched on top of each other. 

The camera and snowman feature of my Babylock Ellisimo Gold were lifesavers. Even in the placement of the first design I used the snowman first, then the camera, to make sure the placement was exactly matched up with all my stitching lines.  Thankfully, it was right where I wanted it. I stitched the first design and then used the camera to find the placement of the second design. Presto! Right on the mark again. I cannot imagine having embroidered this project without that scanning feature. 

Most everything fit exactly as I had imagined it, with the exception of the sleeve area.  The very end of the scroll goes into the seam allowance, but that was adjusted when I sewed by taking it just right to the edge of the scroll and right there is the best part about constructing your own garments instead of purchasing them to embellish. 

Which do you prefer to embroider on - ready-made garments or constructing your own garments?


Illuminated Manuscript Quilted Pillow Pattern

Next Saturday, March 19th, is National Quilting Day. I think “National” days are so much fun, but I really like to know about them ahead of time, so a quilted pillow pattern is just the thing to celebrate National Quilting Day next week.  You can accomplish this project in one day and by telling you ahead of time, you can gather your supplies and do it next Saturday – actually on National Quilting Day. Now that is planning. 

Machine Embroidery Designs by Sonia Showalter

Machine Embroidery Designs by Sonia Showalter

Medieval illuminated manuscripts were the inspiration for this pillow. The pillow is a combination of quilting and machine embroidery in gold metallic thread. The machine embroidery designs were from Sonia Showalter and were sewn after it was quilted using the Snap Hoop Monster by Designs in Machine Embroidery. I think another idea would be to embroider actual words in the blank parchment block. 
If you do not have a embroidery machine, do not let that hinder you. The pillow does not need to be embellished or you could even embroider it by hand as hand embroidery is really becoming very popular again. DMC, a manufacturer of excellent embroidery threads, has a page dedicated to the different stitches on their website and there are wonderful YouTube demonstrations just waiting for you to google

ILLUMINATED MANUSCRIPT QUILT TOP

MATERIALS:

1 fat quarter of parchment silk dupioni

1 fat quarter of royal blue silk dupioni (also 1 additional matching fat quarter is needed for the back of the pillow, if you are making the pillow)

18” square of batting

18” square of muslin

CUT BLUE (B) SILK:

B1 = 2 pieces 2.75" by 13.5" for outer border

B2 = 2 pieces 2.75" by 18" for outer border

B3 = 1 piece 4.5" by 4.5" for main block

B4 = 2 pieces 2.5" by 8.5" for stripes off block

CUT PARCHMENT (P) SILK:

P1 = 1 piece 1.5" by 13.5" for inner border

P2 = 1 piece 1.5" by 12.5" for inner border

P3 = 3 pieces 1.5" by 8.5" for stripes background

P4 = 1 piece 8.5" by 9.5" for main parchment block

LAYOUT: The layout is available as a PDF here.

STITCHING ORDER:

  1. Stitch block P3 to each side of block B4.
  2. Attach this new block to B3 on the right side.
  3. Sew P3 and B4 together.
  4. Sew P4 to B4 of this new block.
  5. Attach this new block to the bottom of B3 that was made in step 2.
  6. Connect P2 to the block created in step 5.
  7. Connect P1 to the block created in step 6.
  8. Add B2 to the right sides of the block created in step 7.
  9. Add B1 to the top and bottom of the block created in step 8.

This finishes the creation of the block.  It can now be quilted. I stitched in the ditch to highlight the blue blocks only.

Once the quilt top has been quilted, you would sew it like any other pillow that has piping/cording and a zipper. 

To complete the pillow I also used:

20” matching royal blue zipper

20” square pillow form

2 ¼ yd gold cording 

(also 1 additional royal blue fat quarter of silk dupioni is needed for the back of the pillow, if you did not include it in the quilt top)

_______________________________

When finishing the pillow, Pam Damour’s instructions in her PDF entitled Pam Damour's Foot Notes - Ten Steps to a Perfect Pillow, are fabulous. Take note of her special technique to taper the corners.  This is really important and makes all the difference in making an elegant pillow.  Thank you Pam for sharing this important tip with all of us. By the way, she does have several acrylic templates for sale on her website for tapering those corners.  Pretty clever!

My version of the illuminated manuscript quilted pillow has been submitted to the Second Annual Nancy Zieman Pillow Challenge. The deadline for submissions is March 20th and online voting begins March 22nd, so I will surely be linking to that voting page then. The grand prize is a Baby Lock Anna sewing machine and that would be wonderful to take along when I teach sewing. 


Next Saturday is also National Let’s Laugh Day, so truly enjoy next Saturday.  So what are you doing to celebrate?


Mustache Pillow Pattern

March is National Craft Month and to help you celebrate it is a pattern for a sewn mustache pillow.  Several years ago, mustaches were in vogue. Everything had a mustache on it and funny antidotes were made with “mustache” – like my blog page entitled “Mustache a Question.”

Our youngest son fell for the craze and asked if I would make him a mustache pillow for his room, which you can tell was a while ago since it is so faded, but those are the kind of requests that a mother jumps up and down about – teenage son asking to me to sew!!! It was done in a flash.

When I was recently cleaning my sewing shelves, I noticed that I still had the pattern in my metal sewing box, so it was perfect for sharing with you this month. Hopefully, mustaches are still faddy enough for you to still enjoy.

MUSTACHE PILLOW PATTERN & INSTRUCTIONS

MATERIALS:

¼ yard fabric

Stuffing for the pillow

Pattern to download – Part one herePart two here

Invisible tape to use for the pattern

Usual sewing paraphernalia and a machine (or can be sewn by hand)


NOTES: 1.  Pattern uses ½” seam allowance.  2.  The quarter is for reference.  Please make sure it is the same size as an actual quarter when you print the pattern.

SPECIAL SEWING INSTRUCTIONS for the points on STEP 5

STEP 1 - Wash and dry your fabric because a pillow is always cuddled, so it will need to be washed eventually. Press if necessary.

STEP 2 - Download the pattern above and tape the two parts together by connecting Part 1 with Part 2 by matching the 1A to the 2A and the 1B to the 2B. Then cut out the pattern on the cutting line.

STEP 3 - Place the pattern on the fold of the fabric and cut two from the fabric.

STEP 4 - Lay fabric with right sides together and sew with a ½” seam allowance leaving a 3” opening at one of the widest edges, but not in the middle or an end.

STEP 5 - SPECIAL SEWING INSTRUCTIONS for the points – When you are about 3 stitches away from the point which will be a little over the ½” from the edge – STOP – change your thread stitch length to the smallest possible. Stitch half way from the starting point to the edge then pivot – STITCH 3 stitches – then pivot and stitch to same place that your started, but now on the other side – STOP – change your thread stitch length back to its normal position and proceed with sewing.  DO NOT sew to the point of the mustache and then pivot.  It will not make an accurate point.

STEP 6 - Trim and clip corners and curves.

STEP 7 - Turn right side out and press.

STEP 8 - Stuff the pillow really full with stuffing, pushing it with a long bamboo stick into the points and around the corners.

STEP 9 - Hand stitch the opening closed.

STEP 10 - Enjoy and share on your social media.  Remember if you share this pattern; please reference back to this blog post.

What are you doing for National Craft Month?

Machine Embroidered Greeting Cards or Just Stitched?

One of my college girls has a birthday coming up and her sister is at the same college, so when I was preparing a birthday box, of course, I had to make a second one for her sister. I had already purchased a set of birthday cards to be sent on just the right day to arrive in time, but I wanted a card to go in the box too.  Initially, I thought I would do a printed birthday banner, but my husband did not look like he was going to give up the printer any time before I wanted to mail the package, so plan “B.”

Michael’s had a wonderful deal on gold-foil cards – 60 cards for $5. That is eight cents a card.  You cannot get them that cheap anywhere! They are a very nice quality, not at all flimsy like I thought they would be. They looked very young and just what the girls would like. However, I wanted to take them to the next level – embroidered cards.

Gold-Foil Note Cards from Michael's

Gold-Foil Note Cards from Michael's

Machine embroidering on paper was one of the first things that I tried when first received my machine.  I am not sure why I was so intrigued that I put it above so many other fabulous features, but I did. I had hooped a piece of medium cut-away stabilizer, sprayed adhesive on the back of the paper and ta-da! It worked beautifully.  Somehow, I had enough common sense not to use a dense design, so it did not cut through the paper and make it pop out like a cut-out.

Stitched Alphabet with Guidelines and Jump Stitches

Stitched Alphabet with Guidelines and Jump Stitches

This summer, I was experimenting with the standard built-in stitches on my sewing machine, as I wanted to know which ones were compatible with the sewing machines that I was going to teach   on at the Fairfield Library (also see Fairfield tag below). During that process, I played with the built-in alphabet characters.  These are different from the actual embroidery characters, because they are generated using the utility function for stitches and the foot pedal. It does not use a hoop or an embroidery foot. It does not sew automatically, the foot pedal must be engaged and I must guide the fabric. This is truly a sewing function, not embroidery and yet they are alphabetical characters.

Reverse Side of Stitched Alphabet with Jump Stitches

Reverse Side of Stitched Alphabet with Jump Stitches

These built-in alphabet characters are so much fun and they are so quick to produce a word and the best part is that they can be done without hooping or stabilizer.  They were just what I needed to make these cards a little more personal. Besides, the birthday girl is the only one in the family who knows how to machine embroider and I know how much she loves machine embroidery.

Finished Greeting Cards

Finished Greeting Cards

So the question is, what do you consider the built-in alphabets – embroidery or stitching?

Army T-Shirt Repurposed

Re-purposing is so much fun and so green.  It is so me. I love to use things that would normally be discarded and use them again, but it is even more fun when it is for your son.

We are so proud of our oldest son who was a drone pilot in the Army.  While he was in flight school someone made these embroidered t-shirts for them. 

He came home for a transition time to the civilian world and when he was preparing to move out, he asked if anyone wanted this t-shirt.  My first response was to inspect the quality of the embroidery, the type of stabilizer and of course, the last stage trimming.  You know, I gave it once over. Then I gave him a hard time because he told me that he would never wear an embroidered shirt.  His come back was that he never did and said, “Mom, did you ever see me wear that shirt?” Well, okay, but I could not throw away someone else’s embroidery and a memento at that. The easiest solution was to make a pillow.  To my surprise he loved the idea.
The t-shirt surprised me though when I was planning what size pillow to make it.  The design was really tucked in the upper corner, very close to the sleeve.  A rectangle pillow would do the trick by offsetting it a little bit in the upper corner as planned; it would look like it was meant to be there.

The embroidery needed as much room as possible so I used the rotary cutter and ruler to make the first cut as close to the neck as possible. 

Then I fussy cut the sleeves out. I could have cut them out first, but by leaving them in tack, allowed me to keep the shirt front and back straight and lined up for that first cut.

After the sleeves came out, I cut down one side and cut the remaining three sides on the front and back. I could have cut the front with the back by keeping them together, but when I had measured I noticed two important things.  First, that the back was larger than the front. Secondly, that the front was not going to make a 12” + 1/2” seam allowance by 16” + 1/2” seam allowance to fit the pillow form that I purchased. I decided to make the front as big as possible 12 ½” by 16” and add the extra seam allowance to the back.  I knew that no one would notice that the seam was slightly pulled forward. The corners were rounded so this knit would not pucker when squared and it would give fullness where the polyfil was lacking, since it did not have the material for a flange or any other time of edging.

This pillow was just to be used as an accent in his bedroom that was grey and with the t-shirt material so flimsy, I opted out of not using my standard zippered closure for a pillow. 

If the pillow was dirty, I just assumed that the pillow form would be too and it was small enough to wash the entire pillow in the machine. Of course, that was the first thing my son pointed out. “Mom, where’s the zipper?”  Technically, that was a good response.  It means we as sewers have done our job well when our family notices when we cut corners. What has your family noticed?

Sewing Camp - Project Four of Four

Four days of sewing. What can you accomplish in four days? 

The teens at the Fairfield Woods Branch Public Library accomplished an incredible amount in the their four days.  Most began with no sewing experience at all and by the the end of four days they had received their driver's license from the library's sewing studio and sewn four projects: rice heating bag, round cuddle pillow (so cute & soft), pajama bottoms, and small zippered bag.

Many sewing techniques had been acquired to get to the point of being able to make these four projects.  They had sewn straight seams, enforced faux serger seams, sewn with plaids, sewn with a napped fabric, hand sewn a button onto their pillows, sewed curves, clipped curves, sewn an elliptic casing, and then to finish they learned to sew a zipper.  That is amazing in four short two hour days.

The most amazing part of this fourth day was the way they all soaked up the project instructions with needing very little guidance.  They could see it!! That is such a big part of sewing - being able to see how it is all going to work together. It is a practical puzzle. 

The zippered bags were made from repurposed blue jeans and men's dress shirts. The best! I love repurposing and these fabrics are a dream to work with  - no slipping. We started out with 4 pieces of fabric that were 9 1/2" by 6 1/2" and we used a 1/2" seam allowance.  The only cost involved was a 9", but the library had many of them donated and they purchased a roll of red zipper tape from eNasco. They are so economical when you need to buy in bulk. We also added an optional 1/4" red grosgrain ribbon for a zipper pull.

The construction of the bag is so simple and you can see the instructions at The Purl Bee. While the idea and method were my own, as with all the projects, but he pillow, I wanted some clear pictures with instructions to provide the library when I presented my proposal.  The clear explanation with pictures at The Purl Bee are great, just what I wanted.

This bag is so versatile and can be used for so many things, but from what I heard from the teens, they will be using it as a pencil bag when they return to school. 

How will you use your bag now that you can create so many at relatively no cost?

Sewing Camp - Project One of Four

Sitting at the driver's seat for the first time behind the wheel of a sewing machine can be pretty daunting.  It is a real electrical running machine that seems to have a mind of its own when you put your foot on the pedal.  The motor runs so fast and the wheel starts turning so quickly you cannot even see it turning, then the fabric begins to pull uncontrollably under the feed dogs. With haste, you must gain composure and take control by placing your hands in the correct position and adjust the foot pedal speed to just the right amount - not too fast - not too slow, all while keeping that fabric in the same position on the stitch plate so you end up with a straight seam. 

A loomed sample of knit on the left and woven ribbon as a sample on the right.

A loomed sample of knit on the left and woven ribbon as a sample on the right.

The thirteen teens at the Fairfield Woods Branch Library sewing camp did just that - they conquered the sewing machine. They began with all the visual introductions of learning the difference between wovens and knits, types of fabrics, sewing notions, safety, the anatomy of the sewing machine and then hands-on with threading the machine and loading a bobbin.  They progressed to practicing on paper using templates from the book, The Best of Sewing Machine Fun for Kids. The paper practice allowed them to learn to keep a straight line as well as pivoting through their paper maze.

Now they were ready for their first project.  This was the easiest construction project for them, but with respect to the planning, it was the hardest.  The library was given a generous donation of gorgeous flannel cuts.  That was the challenge - they were curvy cuts - not the ends of bolts or straight cuts - curves.  What can you make out of curvy fabric? Got it! Small sized flannel rice heating bags.  The flannel was so thick and warm.  It was perfect for such a project.  

The project was made with two rectangles cut 11" by 4". Instead of using a straight stitch they sewed with an imitation serger stitch (as I like to call it) - a straight stitch combined with a zig zag stitch.  This combination stitch was to prevent the rice from falling out of the bag (believe me this happens). Once all three sides were sewn, they filled the bag with a half pound of white uncooked rice. It was easy to pour as we had pre-measured the rice and put it in quart size plastic bags.  When it was time to fill up the heating bags, they snipped the bottom corners of the bags and poured from the newly created funnel. It worked great - no one spilled their bag of rice. The hard part was keeping the rice at the opposite side from the closure so they could sew up the opening.  Success! Everyone had a functional rice heating bag. 

These bags are so practical and can be molded to fit your body.  Put them in a clean microwave for about one minute and the gentle heat lasts about twenty minutes. The next day some of the teens reported them lasting up to an hour.  It will vary based upon the strength of your microwave.

These bags are also so versatile and can be used without heating them.  Just use your imagination on all the different ways they can be used: 

~ warmed to soothe an aching neck ~ a book weight ~ a prop for a techy device ~ a smaller square can be used for a toddler's game of hopscotch ~ a large heated bag can be sewn for an old cat to lie on ~ small bags for a toss game ~ even tinier bags for pattern weights ~ a game of tic-tac-toe ~ sewn in a variety of colors for young toddlers ~ juggling ~ etc.

How will you use these bags?


What do Sewing and a Public Library Have in Common?

What do sewing and a public library have in common? Why, anyone who knows what a public library is can answer that question – books!  Of course!  The public library has every possible book on sewing that you could ever imagine.  While not every library will have them all, put them together and anything that has been written on the subject is there.

Public libraries are evolving though.  They do not just contain books as our forefathers first envisioned them.  They started out slowly with the onset of books on tape, then CDs, then DVDs, to today with just about anything you can imagine can be borrowed.  Libraries contain items that you never would expect.

Would you expect your public library to offer sewing lessons? Maybe. You could see a person coming in and providing sewing lessons for an hour or two to introduce the public to the concept of sewing since libraries are a place where knowledge is discovered.  Well go a step further.  Would you be surprised to find a sewing studio in a public library?

Photo courtesy of Fairfield Woods Branch Library

Photo courtesy of Fairfield Woods Branch Library

The Fairfield Public Library in Fairfield, Connecticut has a sewing studio with not just one, but six modern sewing machines. This sewing studio resides in the Fairfield Woods Branch Library that is “Fairfield’s neighborhood library.” The idea was conceived by one of the enterprising staff members who presented her proposal fearlessly to the Friends of the Fairfield Public Library, which in turn graciously funded the sewing studio.

The sewing studio abounds with all the amenities of an individually owned sewing studio with all the necessary sewing notions for each station. It would be the envy of any sewer with its own fabric stash stored in a shelved closet with another room breaming with stacks of donated items such as buttons and zippers just waiting to be used. Fabric and other donations have come from all across New England from generous individuals as well as a national sewing magazine company, a manufacturer of fabric and a clothing manufacturer. Each donation is a grateful addition to the studio.

The new sewing studio was announced in the library’s Winter 2015 newsletter with classes beginning later that month.  The classes have been quite successful and have been expanded to include a weekly “open sew” on Thursdays and a mini summer camp for teens during the month of July (but that is for a later post).

Congratulations Fairfield Woods Branch Library on your new venture!

What does your library offer in the way of sewing?